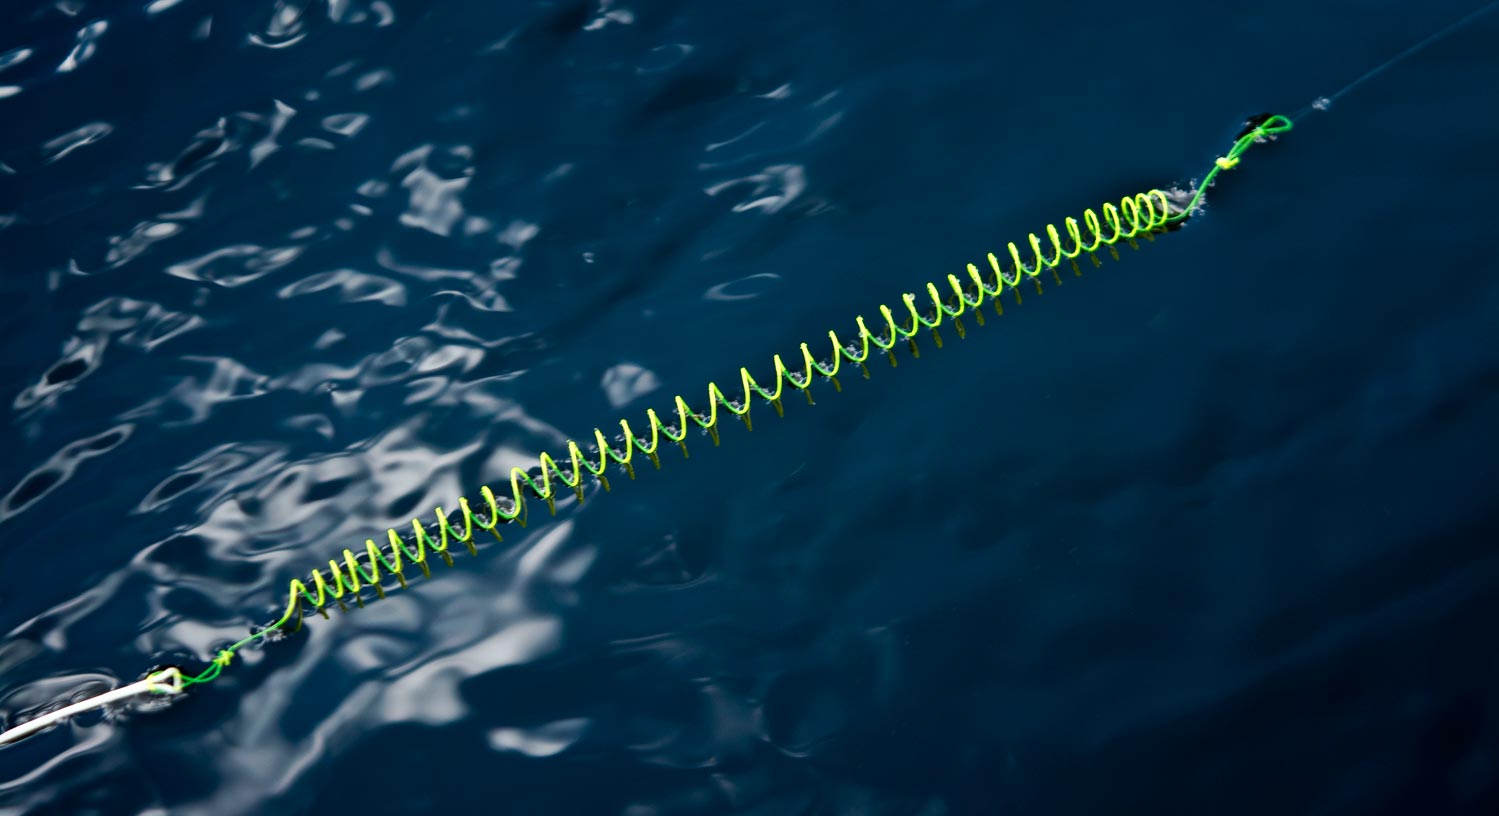
Photo by Louis Cahill
By Johnny Spillane
As we get into fall and fish are becoming more selective and eating smaller bugs like tricos, fishing can become more challenging. Using a French Slinky indicator or Slinky indicator can be a great way to hook a few more fish when they are being ultra selective or ultra spooky.
I like to use it when fish are in shallow water or they are suspended close to the surface in deep water but not feeding on the surface. Typically, I like to use some sort of dry dropper rig in this situation, but if the fish are being picky and ignoring the flies, it might be because of the larger dry fly used to support the nymphs. They have been seeing that stuff all summer.
Removing it can be a big help, but then you’re stuck with the problem of detecting the strike. A slinky indicator is perfect for that situation. It’s easy for fishermen to see, detects even the subtlest strikes and is very difficult for the fish to see. There is no splash when it hits the water so you can get it in fairly close to fish without spooking them and if you grease it with mucilin it actually floats really well and will support a moderately sized dropper. There are countless other ways to use this rig but this is where I have found it to be the most effective for me.
Making the Slinky Indicator
In order to build the indicator, you’ll need a few things. An empty Bic pen case or something similar, duct tape, 15lb high visibility monofilament and some boiling water.
Cut a two foot section of the mono and tape one end to the pen case leaving a 6- to 8-inch tag and then tightly wrap the mono around the pen 8-15 times depending on how long you want your slinky indicator to be. Tape the other end of the mono to the pen. Make sure you use more than one wrap of duct tape because when it goes into the water it can come unwrapped.
Next place the pen into the boiling water and leave it there for about 5 minutes. After five minutes, throw the pen in the freezer and let it sit for at least a few hours. When it is done, leave the mono on the pen and only remove it when you are ready to use it. I like to tie perfection loops on both tag ends so that it’s easier to remove and reuse.
Give it a try; I think you’ll be pleased with the results!
Tight lines,
Johnny Spillane
Gink & Gasoline www.ginkandgasoline.com hookups@ginkandgasoline.com Sign Up For Our Weekly Newsletter!
Does the slinky lose ts curl after fighting a fish with tension on it? I assume this goes between the flyline and the leader?
In my experience it lasts through a days fishing but I toss them after that.
After one fish, no. After a days worth of fishing you’ll notice less curl. Especially on warmer days. As far as the overall life of a curly-Q sighter, My experience is about the same. It’s not going to last for weeks, or days. I typically count on the curl lasting thoughtout the day, but that’s about it. There might be some people out there in the competitive world that know how to stretch the life out a little further. But for the best results make a couple the night before and place them in the freezer. Just try not to forget them on the way out of the house! It’s something that is definitely worth trying. It’s a great tactic for skinny water and spooky fish!
How about a video tutorial of how to make one of these sweet Gizmo’s.
That’s a great idea!
I’ve also heard that cooling them in ice water works just as good as freezing them and it a lot quicker if you need them in a hurry. Just swish them in some ice water for 5 or minutes and your done.
Dang Louis…
That’s one long slinky you have in the photo.
That bugger has close to 40 coils in it!
I have to ask… what type of set do you use to come tight?
Just bustin’ chops
G&G is great!
Keep up the good work
When would you prefer to use a slinky sighter over, say a Thingamabober? Is it harder for the fish to spot or more sensitive?
Thanks, Troy
It’s a great tool for spooky fish or subtle takes. The bobber is better for suspending heavy flies in rough water.
a splash of vinegar will help set the color as well. I think they are a very effective suspension tool. We have used themin competition a lot. Green tub mucilin is our go to floatant. We also paint them with bristle paint for more visibility.
http://www.anglingdirect.co.uk/store/sensas-float-bristle-paint
Pingback: Tippets: DIY Slinky Indicator, Studying Archerfish | MidCurrent
How big of a bead head fly will a slinky hold up given a minimal amount of mucilin?
https://www.youtube.com/watch?v=ojUSPapgwCI
this is for rod leashes such as kayakers use, but it’s the same exact concept. Instead of reversing by hand, as was done in the video, stick one end in a drill and spin the opposite direction of the curl, unless you want it loose, then just skip this step. I’ve made several of these and it’s easy and it works.