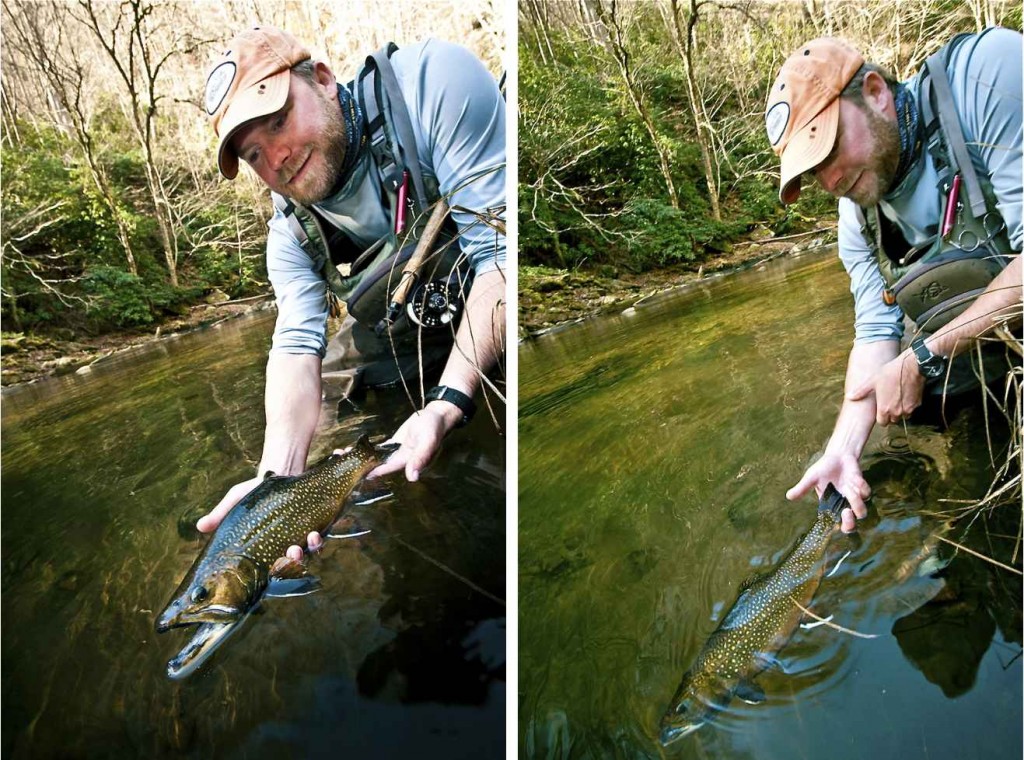
Get the perfect catch and release shot.
Your best shot at capturing a good photograph of you and your catch, is first having someone along with you that’s competent with a camera in their hands. But even a world class photographer will tell you, it’s extremely difficult getting those picture perfect photographs, if the person handling the fish has no clue what their doing. Some of my favorite fly fishing shots to look at are catch and release shots, because there seems to be something extra moving about capturing the release of a fish in a photograph. Problem is, release shots are often some of the hardest photographs to pull off on the water. You have to have satisfactory light and adequate water clarity, but even with both of those, much of your success will ultimately be determined by the cooperation of the fish your shooting. Below are four tips for capturing better release shots that Louis and I have learned through trial and error over the years. Followed correctly, they should increase your chances at getting that perfect catch and release shot.
Tip 1: Choose a Calm Stretch of Water for the Release When Possible
Fast moving water isn’t optimal. If you can find a nice eddy or a calm stretch of water close by, you’ll find it much easier to photograph a nice release shot. In most cases, slower moving water will provide you with better water clarity for showcasing the fish below the surface during the release. I’ve also found it’s much easier to handle and keep the fish in proper position in slower moving water.
Tip 2: Keep Your Catch Calm and Relaxed
Don’t be in a rush to get the shot. Keep the fish in the water and in the net until it has calmed down before you move forward with the release shot. This is especially true if you land the fish quickly. A hot fish generally will swim off so fast, it will be hard for the photographer to time and get the best shot. Your goal is to release the fish at a speed that lets the photographer shoot multiple shots. This will increase the chances you end up with the perfect photograph.
Tip 3: Use Your Arm For Better Control and Timing the Release
One of my best tricks I’ve learned over the year when staging release shots is to use my arm like it’s a water slide for the fish. I’ll wet my arm and lay the fish against my arm, then holding the fish’s head in the water, I time the release of the fish as it gently kicks its tail in my hands. If done right, you’ll feel like the release was in slow motion.
Tip 4: Practice Makes Perfect
My first C&R photo attempts with Louis didn’t turn out so hot, but even those failed attempts early on were helpful, because they taught us the right and wrong ways to go about shooting release shots. The more you practice this niche photography, the better you’ll get. Having a camera that has the capability to shooting exposures quickly is very important. Just remember, no matter how much you stage everything perfectly, you still need a cooperative fish, and please don’t jeopardize the health of your catch trying to get the perfect shot. Always make sure the fish has been properly revived before you try a release shot.
Keep it Reel,
Kent Klewein Gink & Gasoline www.ginkandgasoline.com hookups@ginkandgasoline.com Sign Up For Our Weekly Newsletter!

Great tips Kent. Love the release shot, which is safer for the fish, creates a beautiful memory, and shows that it is still out there for an opportunity for someone else. That composition tells such a richer story than the grip and grin, doesn’t it?
Nice idea, but one should NEVER touch the fish with bare hands. It removes much of the protective covering on their scales and then allows algae to grow and eventually kill the fish.
Thanks Mick. I’m sure you mean dry hands.
I find that setting my camera to rapid-fire
“burst mode” and shooting multiple photos really helps me. When I look through the photos at home usually at least one of them really stands out from the rest.