Getting the Hero Shot When You’re fishing Solo

Photo by Louis Cahill

Photo by Louis Cahill

“How do photograph my fish when I’m by myself?”

I get this question all the time and I wince every time because I know there are many guys doing great harm to fish in an effort to capture the moment. I know because I was once one of them. Before I took photos of fish for a living, I took them for the same reason everyone else does. To have a memento of the experience. There’s not a thing wrong with that, but there was plenty wrong with the way I went about it.

With that in mind, and from a place of total humility and a little bit of shame, I’ve decided to try and help by laying out some strategies for getting a good solo photo of a fish without doing it any harm. It may require a little more work or some compromise but in the end you and the fish will both feel better.

Let’s start with what not to do. The mortal sin is to beach the fish. Never, ever take a fish out of the water and lay it on the bank for a photo. This kills fish three ways. It removes their protective slime and exposes them to harmful bacteria. It deprives them of oxygen for too long when they are already stressed and it puts them at risk for head trauma if they panic and start to flop around. What’s worse is to lay the fish on the snow in the winter. The risk are the same with the added chance that the cold will damage the delicate gill tissue. (Read more on that here) don’t try to juggle the fish and the camera for a reach-out-shot. You’ll most likely drop both.

Now let’s look at some options that can make for a good photo with out anyone getting hurt.


An old Selfie

An old Selfie

The self timer

Most cameras have a self timer that you can use to take a photo of yourself. Of course, carrying a tripod while fishing is a nuisance. There are still some good options. You can often find a rock or a log to set the camera on. A flexible mini tripod makes this safe and easy. For soft ground, like when wading flats for bonefish, I use a plastic tent stake from Home Depot with a camera mount glued on top. You can position the camera while the fish rests in the water. Most cameras have a light that lets you know when they will shoot, so you can lift the fish at the last second. This approach gives you the traditional hero shot and is perfectly safe for the fish.

31QS3PZXPBL

ff8cb7f1-08c7-4927-ae09-736ad5f8933c_300


IMGP0638b


The underwater camera

There are some really good underwater cameras on the market these days that won’t break the bank. With an underwater camera you can get the shot in the fish’s environment where he is safe, happy and looking his best. You can tail the fish or just let him rest in some soft water for his portrait. Underwater shots are cool and really show off the fish with his fins full and natural. I like the Pentax waterproof cameras and there are even waterproof cases for your iPhone.

edit-3101-2

The Macro Shot

It’s not always about size. The beauty of a wild fish is often more impressive than the size of a monster. A macro lens or macro mode on a point-and-shoot lets you capture the beauty many people never see while keeping the fish safely in the water. Hold the handle of your net between your knees and get in close.

_DSC1781


Creative angles

I was alone when I caught my largest steelhead. A forty-two inch beauty from the Dean River. I knew there was no way to safely get a hero shot of that fish without help and there was no way I’d risk any harm coming to him. I chose to capture a photo of his impressive tail just before releasing him. You can’t see his length or girth in the photo but the tail tells the whole story. Think outside the box, you may be happy with the results.


Basic guidelines

Here are a few things to keep in mind whenever you are photographing fish.

Keep the fish in the water as much as possible. Hoist them for about ten seconds if you must but then give them a breath. Remember, fish don’t have lungs so they can’t hold their breath like we do. When deprived of oxygen their color starts to fade so a healthy fish is a good looking fish.

Never squeeze a fish or hold him under the belly. You can put a lot of pressure around his tail without harming him but his organs are vulnerable. Keep a hand under his pectoral fins and jaw where the bone carries the weight.

Hold a fish loosely. The tighter you grip them, the more they panic and fight. A relaxed fish who is not starved for oxygen is easy to hold and looks great in a photo.

Keep your hands on the back side of the fish where they don’t cover his markings. Be sure his fins are nicely presented. More fish, less hand makes a good photo. Keep the fish level and at the surface of the water. Don’t roll him back where all you see is his belly.

Above all, treat the fish with respect. Never hold him by his fragile jaw or gill plate. Don’t hoist him over your head or horse around with him. It may seem cool at the time, but you will look back on it with shame. Make sure your photo shows, not only a great fish, but a great fisherman.

Come fish with us in the Bahamas!

Louis Cahill
Gink & Gasoline
www.ginkandgasoline.com
hookups@ginkandgasoline.com
 
Sign Up For Our Weekly Newsletter!
 

Peacock Bass In The Amazon, Part 2

Fly Fishing for Peacock Bass in the Amazon. Photo By: Scott Heywood

Packing for Success in the Amazon

If you haven’t read part 1, you can find it here.

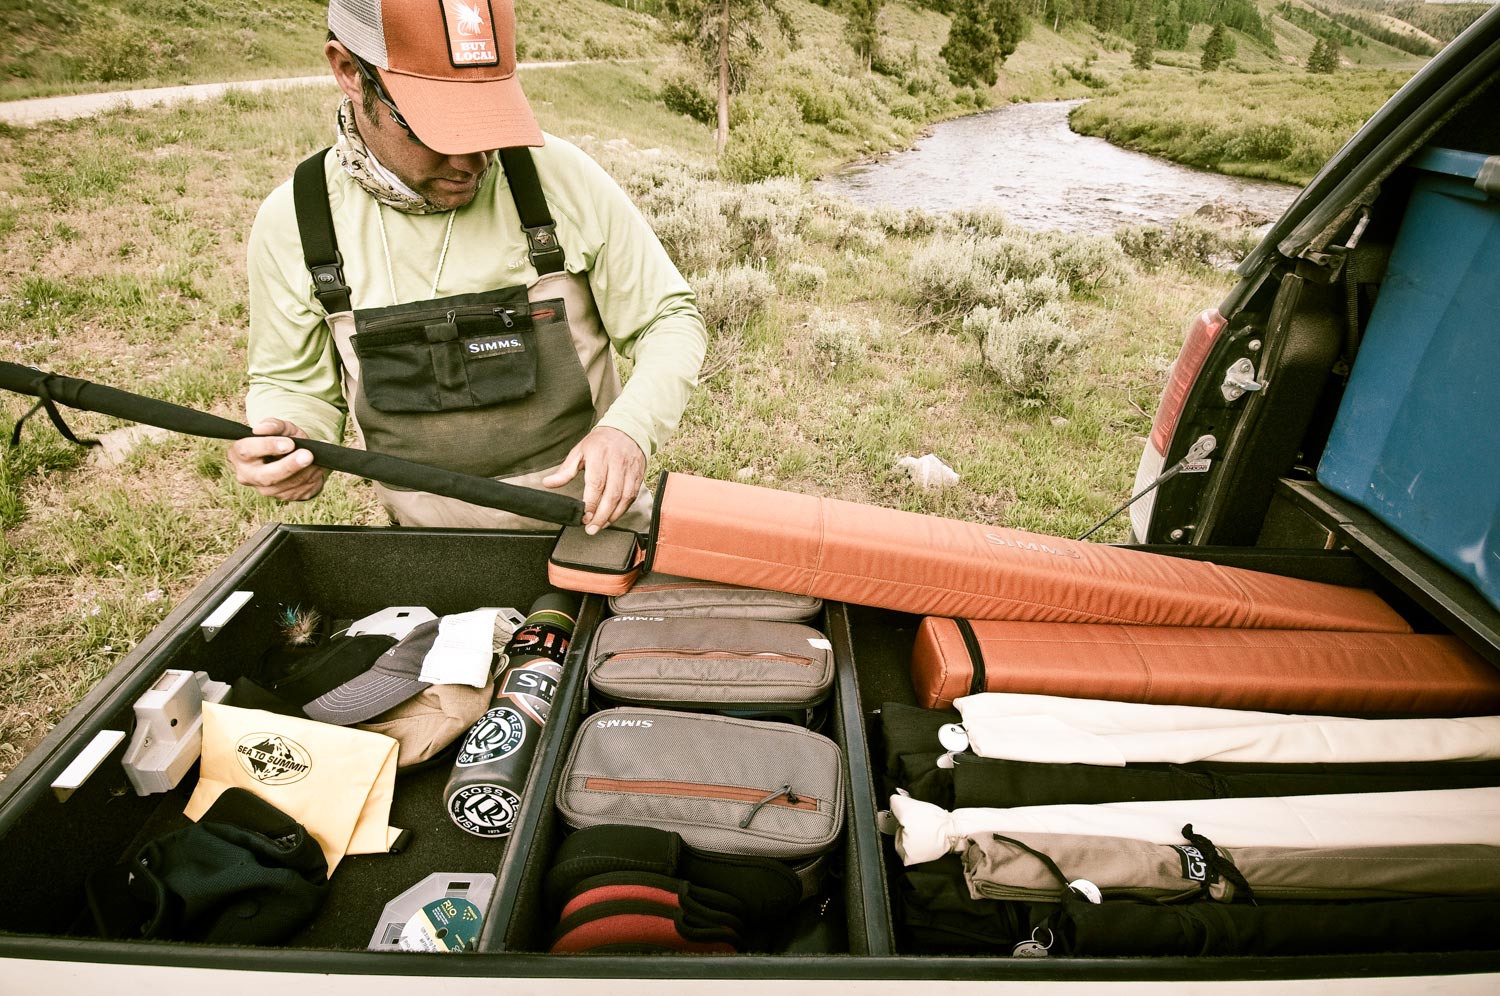
Preparing and packing the right gear prior to your departure to the Amazon is crucial for your overall trip enjoyment and fishing success. Following these gear recommendations, fishing tips, and general amazon facts, will ensure that you’ll be ready to tackle the monster peacock bass you’ll encounter as well as the hot tropical climate.

One important factor that rookie amazon anglers often fail to realize is water levels on the rivers and tributaries of the Amazon River can make or break your trip. Sometimes conditions will be perfect a week or two before your departure, and a couple days before your scheduled to leave, you’ll receive an updated water level report informing you that conditions have deteriorated. It’s just part of the game. It comes with fishing a river that provides us with 1/5 the worlds freshwater supply.

Talk to any veteran peacock bass angler and they’ll quickly tell you how big a role water levels play in the fishing and how helpless you are at controlling them. Despite there being both wet and dry fishing seasons in the Amazon, sometimes the seasons end up being the opposite of what they should be for the time of the year. Your best bet for coping with this uncertainty is booking your trip with the right Amazon outfitter or lodge. The, fly fishing only, Agua Boa Lodge, located in Brazil, is best suited for coping with both high and low water levels because of its specialized equipment, exclusive location, and the diversified fishing operations.

Water Levels are Important in the Amazon

If water levels are too high, peacock bass often will move back into the flooded jungle shorelines making them difficult to coax out or present a fly to. On the flip side of the coin, if water levels are too low, your guides might not be able to access certain watersheds, or even worse, those glory hole lagoons that often hold schools of trophy size peacock bass. It is after all, the rainforest, right? Don’t let this deter you from booking your trip though, I just mention this since there’s many anglers out there that think just because they travel to another continent they’ll have perfect fishing conditions. Unfortunately, that’s just not how it works in the real world. I learned a long time ago, keeping realistic expectations for my international fishing trips is the best approach. That way if I meet or even exceed my expecations, it’s icing on the cake.

Fish Species of the Amazon

What attracts the majority of anglers to the Amazon is its four species of hard fighting and beautiful peacock bass. The speckled peacock “paca” and peacock tunacare “barred” are the bread winners due to there ability to grow well over twenty pounds, while the other two species of peacocks, the butterfly and royal, grow up to 10 pounds but make up for their smaller size with higher overall numbers. But with over 3,000 fish species documented and countless others undiscovered in the Amazon Basin, you never know what you’re going to find at the end of your line. I suggest you bring a Boga Grip to safely handle and weigh your catches during your trip, because you’ll find most fish either have razor sharp teeth or pointy spines. Species that don’t pack these defenses will make up for it in size, agility, speed, and brute strength.

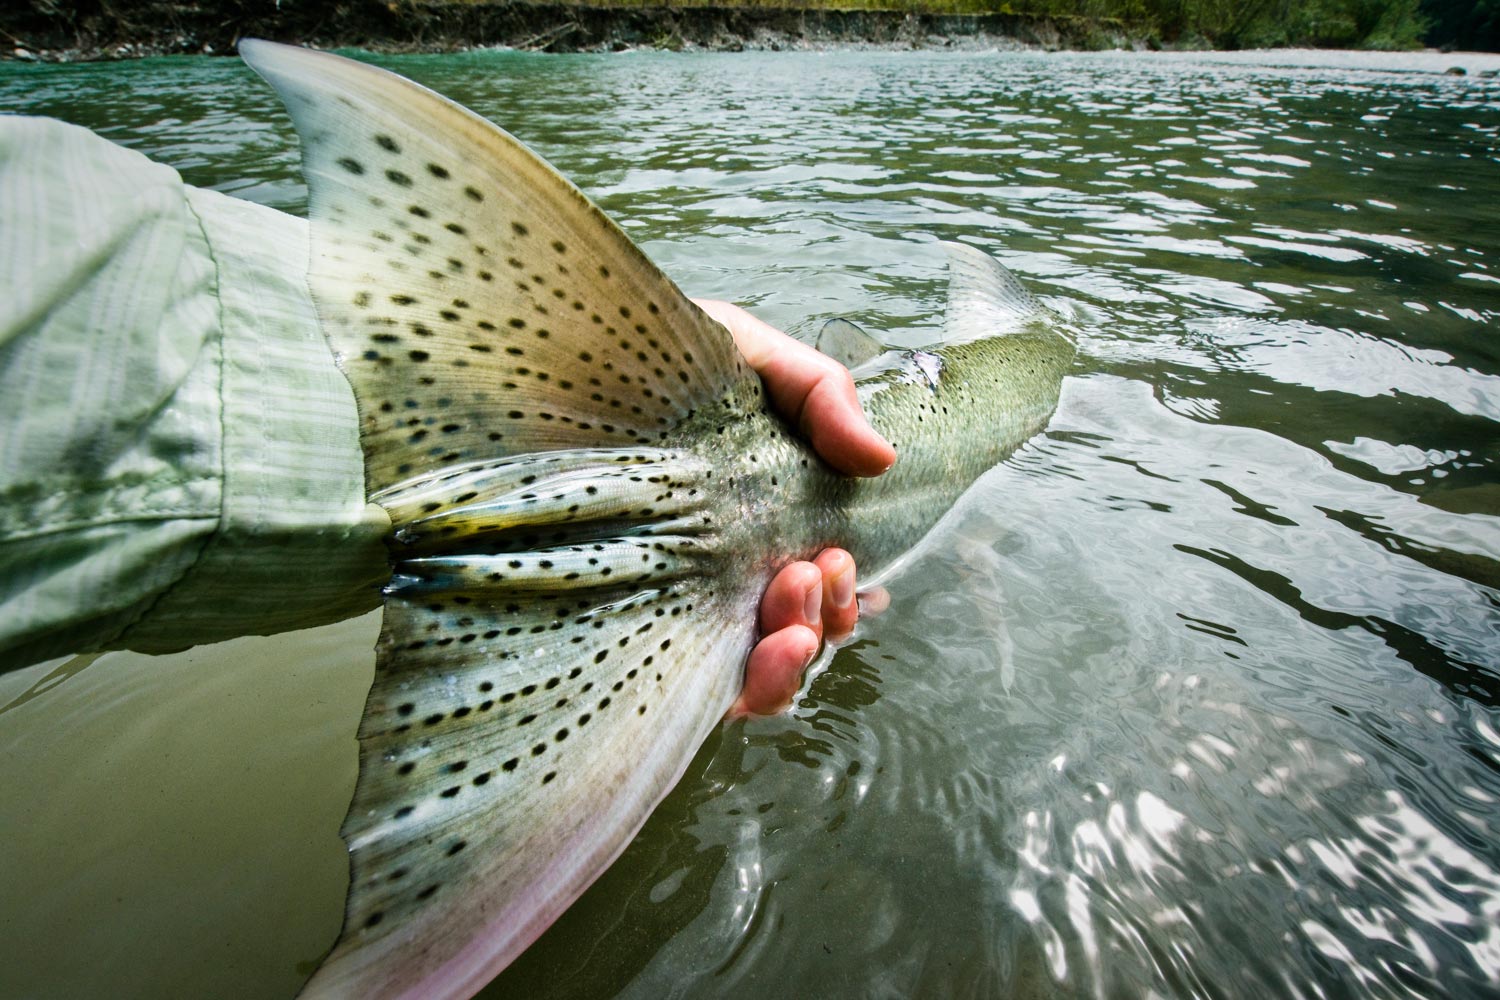
The Tail of a Speckled Peacock “paca”. Photo By: Scott Heywood

Fly Rods for the Amazon

Your sure to get plenty of sight-fishing in during your trip, particularly if you book at the Agua Boa Lodge. However, don’t be shocked if you end up blind casting large portions of the day in search of big peacocks. Most of the time the larger fish will be holding in deeper water out of sight, and it can be very exhausting making long casts followed by quick retrieves for hours on end. Make sure you pack three 9′ fast action fly rods in the 8-10 weight range. I recommend further choosing saltwater fly rods over freshwater rods because they generally have stronger butt sections, better suited for controlling and turning trophy peacock bass away from snags. I personally prefer a nine or ten weight for most my peacock bass fishing because I don’t like to be under gunned, but it’s nice to have an eight weight for the smaller butterfly peacocks and the other species you’ll encounter like aruana “arawana”, trieda and pacu.

Fly Reels for the Amazon

Until you hook into a big peacock bass your not going to be ready for their incredible power and strength. Your biggest obstacle is keeping them out of snags where they’ll quickly break you off. This calls for packing saltwater fly reels that have drag systems powerful enough to stop a freight train. I know it sounds cheesy, but that’s the first image that popped into my head when I hooked into my first 15+ pound peacock bass. I prefer high-end fly reels like Nautilus, Hatch, and Tibor that are powerful, durable and precision made. The last thing you want is burning up a reel in the middle of your trip or even worse watching helplessly as a fish of a lifetime peels off line towards the jungle timber. That being said, I will say the best fly reel won’t do you any good at stopping a fish until you clear the line and get the fish on the reel. Expect many fish to be lost within the first few seconds of the fight, which will greatly be dependent on how close your boat is from the bank, and at what point the fish eats during your retrieve.

Fly Lines & Fly Patters for the Amazon

I’m embarrassed to admit before I made my first trip to the Amazon for peacock bass, I thought all I needed was a tropical floating line and some big poppers. It’s true you can catch big peacocks this way but you’ll often find your best chances for consistently hooking up with the trophies, is to fish big streamers 4-6″ long with sinking fly lines. Floating lines and poppers are great for busting fish, smaller peacocks, and other exotic species, but most fly anglers will admit even saltwater poppers just don’t cause enough commotion on the surface to regularly bring up the big boys. It’s really hard for any popper or slider to compete with a 3 1/2 – 5 ounce Woodchopper or Riproller lure, thats churning and spraying water five feet in the air. Conventional lures like these have been known to call in peacock bass from over a hundred yards away at times. On top of that, casting large poppers is just too strenuous to keep up eight hours a day. Don’t get me wrong it will work and it’s fun seeing the peacock bass explode on your popper, but even the best fly casters will scream uncle after and hour or two.

If you do happen to find yourself on a trip in the Amazon with extreme low water, you may find the floating line with weighted streamers effective. Especially when sight-fishing to spooky fish. It’s a whole lot easier to present your fly softly with a floating line than a heavy sinking line. That’s the main reason you don’t want to make a trip down there without one because you always have to be ready to rig up according to the conditions. Odds are though, you’ll end up stowing your fly rod with the floating ling most of the time during the trip. You may even want to pack a clear intermediate fly line as well.

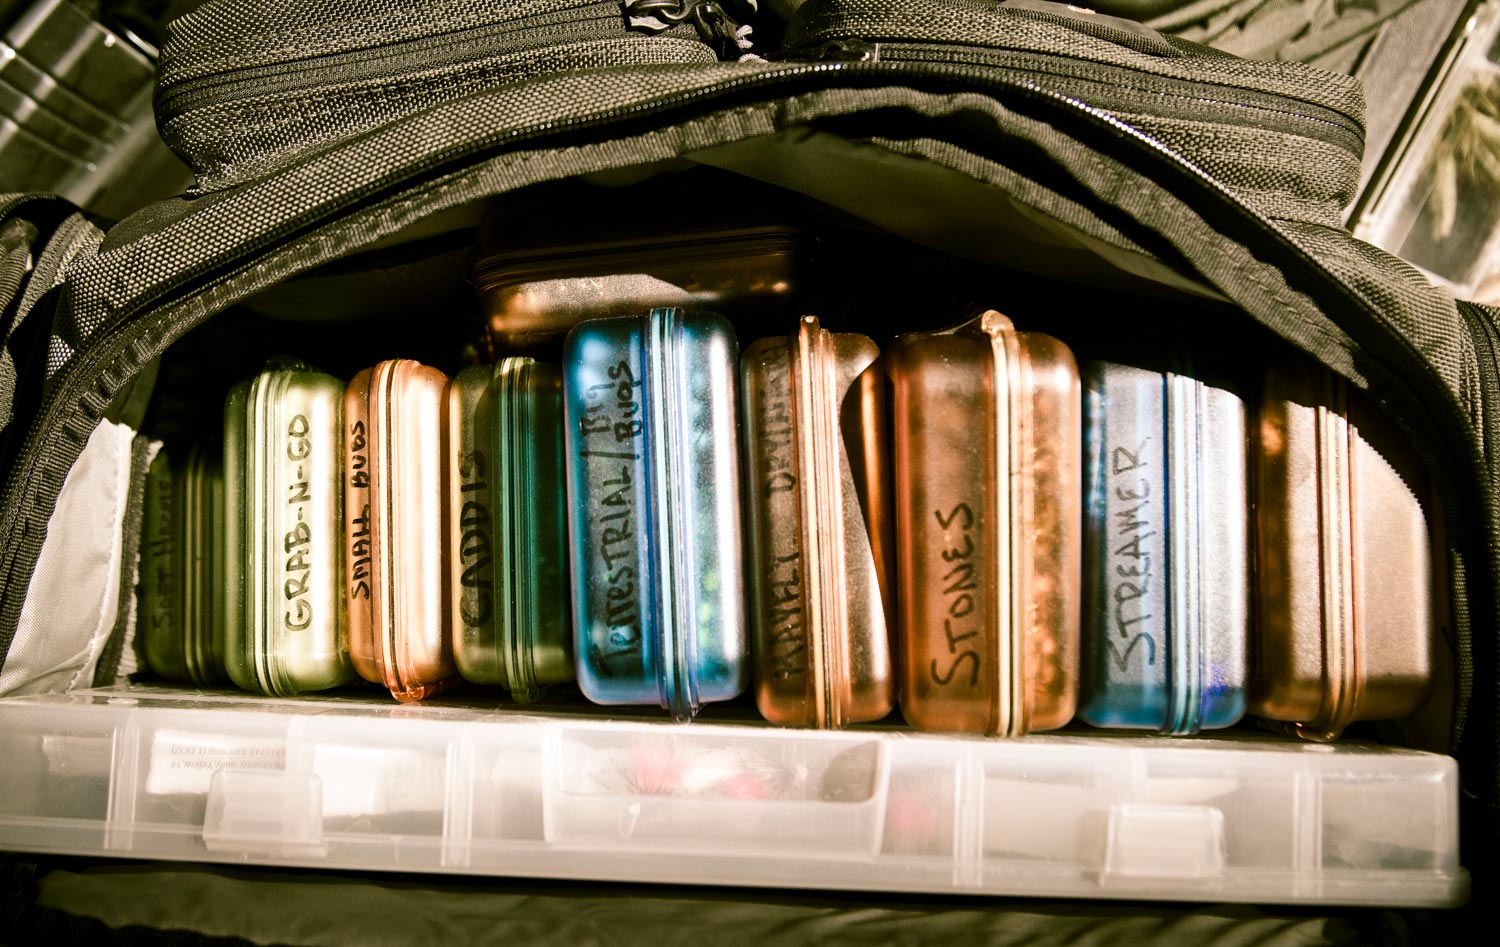
If you want to come back from the Amazon with bragging rights and pictures of you holding double-digit fish you better pack your 200-350 grain sinking fly lines. I stated before that most of the time the biggest peacocks will be found in the deeper water. You also find really quickly peacock bass prefer a very quick retrieve. Because of this, a sinking fly line is required to keep your flies down in the strike zone. I get asked all the time what are good fly patterns to tie for big peacock bass? Google fly patterns for pike and musky, that’s all you need to know. Just make sure you beef up your hooks to saltwater tarpon hooks or something comparable. Peacock bass can straighten even the strongest hooks. I spent many hours in a peacock bass tackle shop changing out factory treble hooks on Woodchoppers to 4x and 6x strong VMC hooks. That’s some serious hardware believe me.

Leaders & Tippet for the Amazon

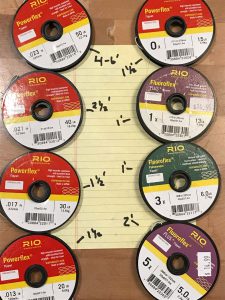
Peacock bass for the most part aren’t leader shy, except in extreme low water conditions which may call for a longer leader. Generally a 6′ fluorocarbon leader 30-50 lb. will work fine for peacock bass in most fishing conditions with floating lines. For sinking lines I like to use a 2-3′ fluorocarbon leader of 30-50lb. Remember that shallow low and clear water conditions may call for smaller pound test. I pack spools of 20 to 50 pound fluorocarbon on my trips. Make sure you pack plenty because your going to be retying quite a bit and you’ll also have break offs in snags. Depending on where your fishing piranha can reek havoc on your flies as well. Make sure you pack a good four dozen flies to be safe.

Productive Peacock Bass Water

Lagoons in the amazon are hotspots for big peacock bass. Once your guide brings you to these productive areas search out the deep water areas first. Position the boat in shallows and cast to the deep water. This is where you’ll regularly find the biggest fish in the area. Try to find key areas where peacock bass can drive forage food to the shallows that’s also in close proximity to deep water. Examples are the edges of jungle timber adjacent to deep water, the points of sandbars or sloughs between islands with deep water close. The mouths of the lagoons and the main river are hotspots for big peacocks waiting for fish to enter and exit the area. Search out grass and vegetation break lines working your flies into deep water.

During high water conditions find steep hard high banks on the river or in lagoons that limit the bait and peacocks from getting out of reach. Concentrating on points or isolated edges of timber or trees in high water will be the hotspots to look for. Whatever you do and no matter what river you fish in the Amazon, don’t let your guide keep you on the main river fishing straight lined banks all day long. It’s happened to me before and you won’t see near as much action as targeting lagoons, confluences, and bends.

Barred Peacock Bass. Photo By: Scott Heywood

Please contact Scott Heywood at Angling Destinations if you’re interested in booking an Amazon peacock bass trip. He’s got many trips under his belt personally and he can answer any questions you have about fly fishing the Amazon Basin, it’s smorgasbord of species, and all the trip details for the Agua Boa Lodge. If you’re lucky you might even find an open spot for his next hosted trip. I hope this post was informative and you’re drooling over the chance to tangle with one of the beautiful gamefish.

Keep it Reel,

Kent Klewein
Gink & Gasoline
www.ginkandgasoline.com
hookups@ginkandgasoline.com
 
Sign Up For Our Weekly Newsletter!
 

A Tight Line Presentation is Key in Saltwater Fly Fishing

Dickey does it every time Photo by Louis Cahill

Dickey does it every time Photo by Louis Cahill

Slack is not your friend.

When fly fishing in saltwater, keeping the slack out of the system is job one. Slack can cause missed fish, long distance release and even refusals. A tight line is key at every stage of the process, but many anglers overlook the initial presentation.

Triggering a fish’s instinct to strike relies on the fly having a lifelike action when the fish first catches sight of it. That means that the fly should move in the manner of the prey it represents from the instant it hits the water. In most cases that cannot be accomplished with slack in the system. Even, or maybe especially, when fishing crab patterns where the natural action is the fall to the bottom, slack kills. These flies are often eaten as soon as they hit the water and if the line has slack, you will never know it.

There is nothing more important to success in saltwater fly fishing than a tight line presentation, but it’s not an easy thing to pull off. Here are some tips and a video to help you get the slack out.

Turn over your leader

Easy enough right? I mean, who has a hard time turning over a twelve foot leader into a 30 mph wind. Me, for starters. There are a couple of things that will help. First of all, line speed. The first step in turning over your leader is having the energy in your cast to make it happen. Especially in the wind. You can read all about generating line speed and watch some helpful videos, (HERE) and (HERE).

Another thing that will help you turn over your leader is having a leader that efficiently transfers the energy of your cast. Tie your leader from saltwater hard monofilament. This stiff material turns over well in the wind and carries big flies to your target. Start with a long butt section like six feet of fifty pound test to maximize the energy from your line. Just be aware that this kind of aggressive leader will require some care in making delicate presentations. On calm days a less aggressive formula may be better.

Don’t drop your line when you shoot

It’s important when fishing the salt to shoot your fly to the fish. It lessens the chance of spooking fish, minimizes false casting and gives you a quicker presentation. Many anglers are in the habit of letting go of the line with their stripping hand when they shoot their last cast. This habit is commonly picked up when practicing for distance on the casting pond or lawn. When fishing however, it’s the kiss of death.

Staying in contact with the line will accomplish several things. First, it puts you in the position to immediately take the slack out of your line. Experienced anglers will start this process as soon as the line straightens, before the fly even hits the water. Secondly, it keeps your line from wrapping around your rod as it comes tight, causing a cluster that could cost you a fish. Thirdly, the friction of the line in your hand will keep the energy in the system helping your leader turn over. Lastly, having control over your shooting line helps you not over shoot your target.

Put your rod tip in the water

Dropping your rod tip into the water on your presentation uses the resistance of the water to reduce slack. Even a line with a belly will move the fly when stripped if all of the line outside the tip top is in the water. As your line straightens, crouch and dip the tip.

Don’t shoot all of the line you have off the reel

If you shoot all of your available stripping line you’re stuck. If the fish eats your fly immediately, you can’t strip set without fighting the drag of your reel. Keep enough line available for a good long first strip to clear the slack and, if all goes well, set the hook.

Reach for the fish with your rod

When your fly lands on the water, your rod hand should be extended well away from your body. This puts you in the best position to make effective strips and hook sets. If your rod hand is too close to your body you may not be able to move the fly at all, especially if the current is flowing towards you. You may want to take the time to read my posts on situational awareness and the right hand strip set.

There are a lot of moving parts

Like riding a bike, there are several things going on at once. Making a good tight line presentation is as much about training your muscle memory as anything. Sometimes a picture, or in this case a video, is worth a thousand words.

In this video Captain Joel Dickey demonstrates the components of a good tight line presentation.

Come fish with us in the Bahamas!

Louis Cahill
Gink & Gasoline
www.ginkandgasoline.com
hookups@ginkandgasoline.com
 
Sign Up For Our Weekly Newsletter!
 

Tying Extra-Long Fly Leaders That Actually Turn Over

Flat Water and Spooky Fish Mean Long Leaders Photo Louis Cahill

By Louis Cahill

There are some big advantages to fly-fishing with a long leader, if you can turn it over.

Long leaders, up to eighteen feet in some cases, can be a huge help when targeting spooky trout or species like carp and bonefish. There’s a definite advantage to having some extra stealth, but only if you can turn that leader over. If you can’t, you loose the ability to deliver the fly accurately and with a clean presentation.

Most anglers struggle to turn over long leaders. Sometimes that’s a casting problem, but often it’s just an issue with the leader. Understanding how a leader works, and how to build one properly can really take your fly fishing to the next level, letting you catch fish you may have considered above your pay-grade.

Generally anglers will start off with a fairly standard nine foot leader, and lengthen it when they feel they need to. There’s nothing wrong with that, if you do it right. But if you know you are going to be using a long leader all day, I recommend you start from scratch and build a leader that’s right for the conditions. I change my leaders like I change my socks and I’ll take things like wind and light into consideration when I build them. I like having every advantage.

If you want to learn more about building custom leaders, read my article about Understanding Leaders.

Today, I’m going to talk about how to make an effective long leader starting with a standard leader, whether it’s one you tied or bought at the shop. I will suggest that you tie your own leaders. If you do it right, they will always perform better.

Most anglers will lengthen their leader by adding a long section of tippet. Unless you are doing some kind of technical nymphing, where you want thin tippet that cuts quickly through the water column and gets your flies deep in a hurry, lengthening your tippet is the worst possible way to add to your leader. It is the easiest method, and like most shortcuts, yields the worst results.

Good leaders are designed to transfer energy evenly. Tippet is designed to dissipate energy. That’s important for a good dead drift but bad for turning over a fly. In lengths longer than about two feet, tippet is a liability, from a casting perspective.

What’s important for energy transfer is not the break strength of the leader material but its diameter and stiffness.

A Good Formula

For good even transfer, you want each section of leader to step down in size by about 3 or 4/1000 of an inch. My typical nine foot trout leader has a butt section of 40lb material with a diameter of .021”. I then step down to .017”, then .013” and so on. By the time I’m down to 5X tippet I’m at .006”. A store bought leader will be similar.

If you think about the energy transfer, you can see how adding tippet to make your leader 14, 16 or even 18 feet long is a recipe for disaster. The best way to do it is to add to the butt section of the leader. If, for example, you cut the loop knot off of the butt of your leader and add 5 feet of 50 pound material with a diameter of .023”, you now have a leader that is 15 feet long but turns over with much more power. Add 3 feet of .023 material and 4 feet of .026 material, and you’re up to 18 feet.

Long leaders, even when tied correctly, are still more challenging to fish. Nothing will show off problems in your cast like a long leader. These formulas are a great place to start, but if you are struggling with long leaders, a little casting instruction and practice are likely the answer. If you have a good clean cast, there is no reason you can’t effectively fish really long leaders, as long as they are tied well.

I hope this helps put you on some spooky fish!

Louis Cahill
Gink & Gasoline
www.ginkandgasoline.com
hookups@ginkandgasoline.com
 
Sign Up For Our Weekly Newsletter!
 

A Truck Vault Can Make Your Truck The Bat-Mobile of Fly Fishing

I'm Batman! Photo by Louis Cahill

I’m Batman! Photo by Louis Cahill

It’s human nature, I suppose, to admire in others what you lack yourself.

As I look at the chaotic pile of fly rods, reels and fly boxes in the corner of my office, I am not at all surprised that one of the things I admire most in others is organization.

Organization is a skill my good friend Michael White takes to a new level. Whitie is a sales rep for Simms which means he pretty much lives in his truck. What’s more, wherever that truck is headed, there is usually some great fishing. That was the case the other day when work, and fate, brought Whitie and me both to the Jackson Hole area. Fortunately, we both had the same day off and were able to get out on the water together.

DSC_3726Whitie’s truck is nothing short of the Bat-mobile of fly fishing. In addition to upgraded off road suspension and the best car audio system I’ve ever heard there is an intense gear organization system. In the back under a huge pile of Simms samples that any angler would kill for there is a weatherproof, fireproof, combination locked Truck Vault.


_DSC6235Pull out the two bed length drawers of the Truck Vault and there, perfectly organized, is every piece of fly fishing gear you could ever need. Rods organized by single and double hand. Reels by line weight. Flies by hatch. Waders, boots, packs, everything you need to fish anywhere there’s a road to get you there. It’s a thing of majestic beauty.

The gear never needs to go in the house. It lives there in the truck, ready for action 24/7. There’s even enough room between the Truck Vault and the camper top to blow up an air mattress and sped the night on the river in comfort. It’s like a dream. I am truly green with envy.

7A2PL2HHThe Truck Vault may not be in your price range. They can run a couple of grand like this one from Orvis. Still it’s hard to argue that it’s not worth it. Maybe this winter when I have a day or two of down time I’ll take a run at a DIY version. If I do I’ll post a step by step on it for those of you who are interested. Until then, I’ll have to find more excuses to fish with Whitie.


Louis Cahill
Gink & Gasoline
www.ginkandgasoline.com
hookups@ginkandgasoline.com
 
Sign Up For Our Weekly Newsletter!