The more durable a fly, the more fish you can catch on it and the longer the life of the fly will be.
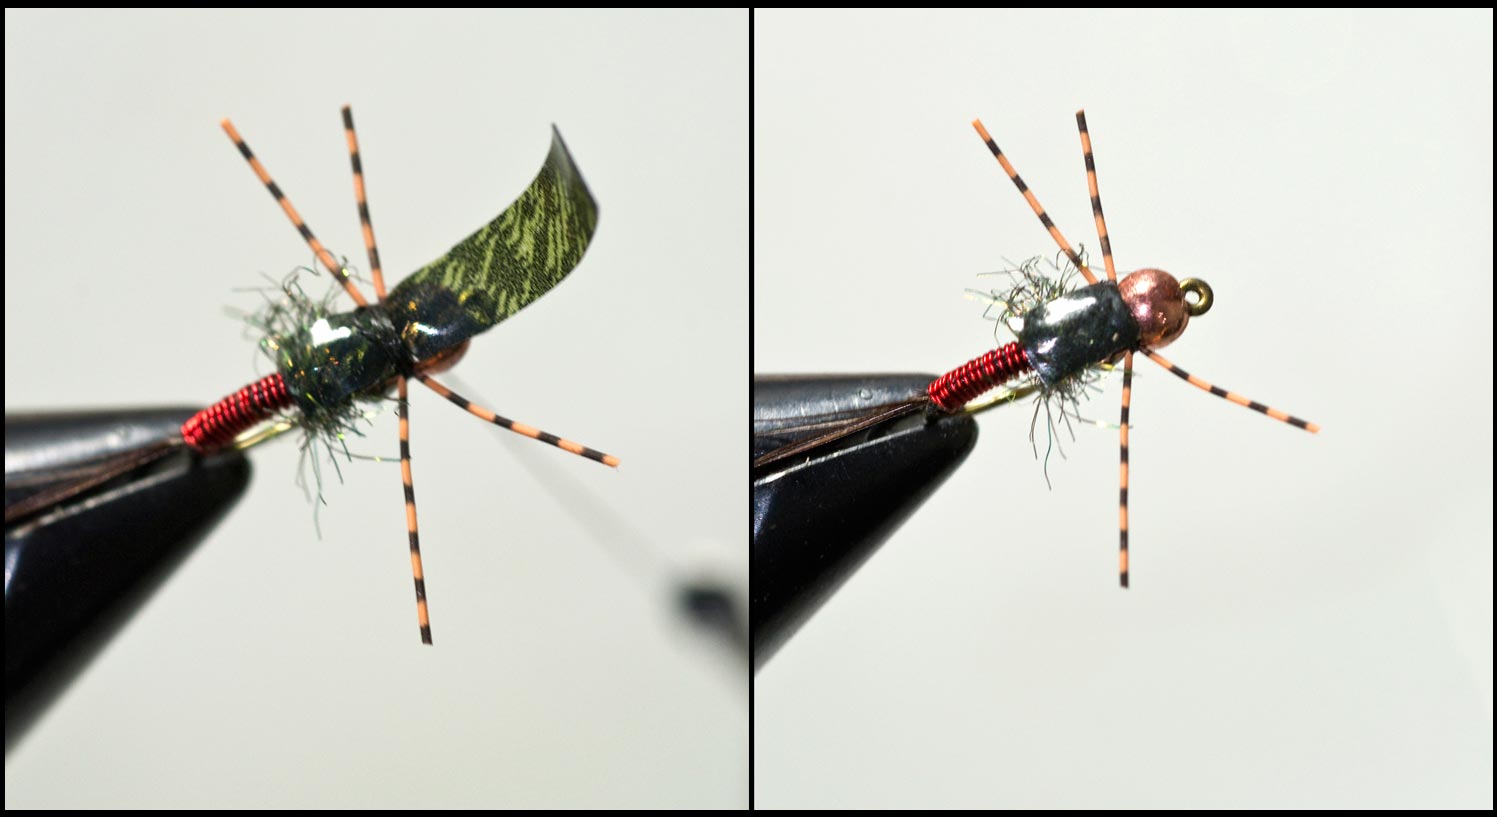
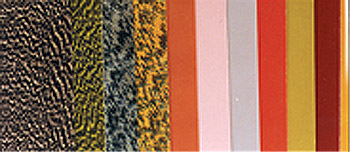
Making a point to tie and purchase your flies with durability in mind will save you time at the tying bench and keep a little extra cash in your wallet. Nymphs in general are the true work horses in our fly boxes. They don’t just get beat up by fish, they’re also constantly getting beat up from banging against rocks on the stream bed during our drifts. One way I increase the durability of my nymphs is to finish off the heads of my flies by folding over and super gluing down a piece of thin skin. This tying technique covers the vulnerable thread at the head of the fly and makes a nice looking nymph wing pad. In some cases, like with my rubber-leg copper john version shown above, I also use thin skin to hide the second bead on the fly pattern. I love using thin skin for many of my fly patterns and it comes in a wide range of colors and patterns. Try it out if you aren’t familiar with using this fly tying material. It’s a must have if you ask me and you can tie a ton of flies with just one package of it. Be prepared to shop around if you’re looking for a specific color of thin skin. Retailers tend to carry only certain colors but never shy away from requesting them to order the colors you need.
Thin Skin Color Options
Thin Skin Fly Tying Examples
(click on thumbnails for larger viewing)
Keep it Reel,
Kent Klewein Gink & Gasoline www.ginkandgasoline.com hookups@ginkandgasoline.com Sign Up For Our Weekly Newsletter!
I love this stuff. I use it on a ton of my stonefly patterns and on czech nymphs. It really helps keep the body and thorax of the fly intact. I also like to tie it over the bead too, especially over painted beads.
Justin,
I knew you already used Thin Skin in your fly tying. I posted about it because I was talking with a buddy of mine who regularly ties and he had never used it before. Got me thinking that there’s probably a lot of other guys who have not yet run across it.
I also thought it would be cool to show how I finish the heads of my nymphs with thin skin to protect the thread and also hide beads. Once you super glue it down it’s there for good and the teeth of fish don’t seem to wear threw it, greatly increasing the longevity of my nymphs.
Thanks for the comment as usual. You’re one of our biggest supporters. Hope all is well.
Kent
Yea, it’s great stuff and it’s has a ton of applications. I tie a shrimp pattern and use medium thin skin as the exo-skeleton of the fly. It looks realistic and it’s super tough. The fly stays together after catching several trout or redfish which makes me happy happy happy. Let your buddy tie a few patterns with it and he’ll hop on the thin skin band wagon soon after.
I’m not clear how you glue it down. Do you fold back over the dubbed thorax and just glue the thinskin to the dubbing?
Fishbaer,
Step 1: Tie in tail material
Step 2. Tie in Wire Ribbing and wrap 2/3 shank
Step 3. Tie in Thin Skin
Step 4. Dub Thorax
Step 5. Fold over and tie down Thin Skin
Step 6. Tie in Rubber Legs
Step 7. Dab a tiny bit of super glue on thread wraps and a tiny bit on the thin skin (wing case).
Step 8. Fold tag of thin skin backwards so it covers wing case have way. Press fingers down firmly to set everything and trim excess thin skin.
Kent
You using a glass bead under there or another brass/tungsten? I tie a similar pattern (way faster than the biot tails and epoxy) but never considered a second bead. Seems a glass bead and tungsten bead could both have a place in the flybox.
Also – almost forgot. Been reading your bloq for a bit. Great work! Nice design, great topics, great photography. Love it.
Derek,
Glad you’re enjoying the website. Thanks for positive feedback.
Kent
Derek,
For that pattern its a copper tungsten up front and black nickel tungsten behind. Was tying those up for the crazy high water by me recently. I like the idea of a glass bead in the back position. Might have to tie some of those up. I also substituted the biot tail for pheasant tail as well since biots are a pain. Thanks for commenting and the glass bead idea.
Kent
Thanks for using my fly’s on your webpage. Cheers!
John