Photo by Andrew Bennett
By Kyle Wilkinson
Long before the days of Instagram or Facebook, taking pictures of a prized catch was still a big part of the fishing experience for most anglers.
As you might be able to imagine, I see A LOT of fish pictures given my current occupation. I also take a lot, too. Now I know everyone has their own opinion about how to appropriately photograph a fish (or if it should even be done) but the fact remains that the good ol’ grip n’ grin is here to stay. In my opinion there’s nothing wrong with this either. And while these days I certainly don’t take a picture with every fish I catch and more often than not try to focus on a more ‘creative’ approach to my fishing photography, sometimes it still feels good to simply hold one up for the camera.
But back to the point of this. As mentioned, I see a lot of fish photos and quite truthfully, a lot of them are pretty bad. If you’ve ever found yourself telling your buddies ‘this picture doesn’t do this fish justice’ (while secretly wondering why that 20” brown looked more like 12” in the photo) then I suggest you read on. Not only will these tips lead to better fish photos, it will also ensure you’re taking better care of the fish by getting your shot quicker, and therefore getting the fish back to the water (you guessed it)…..quicker.
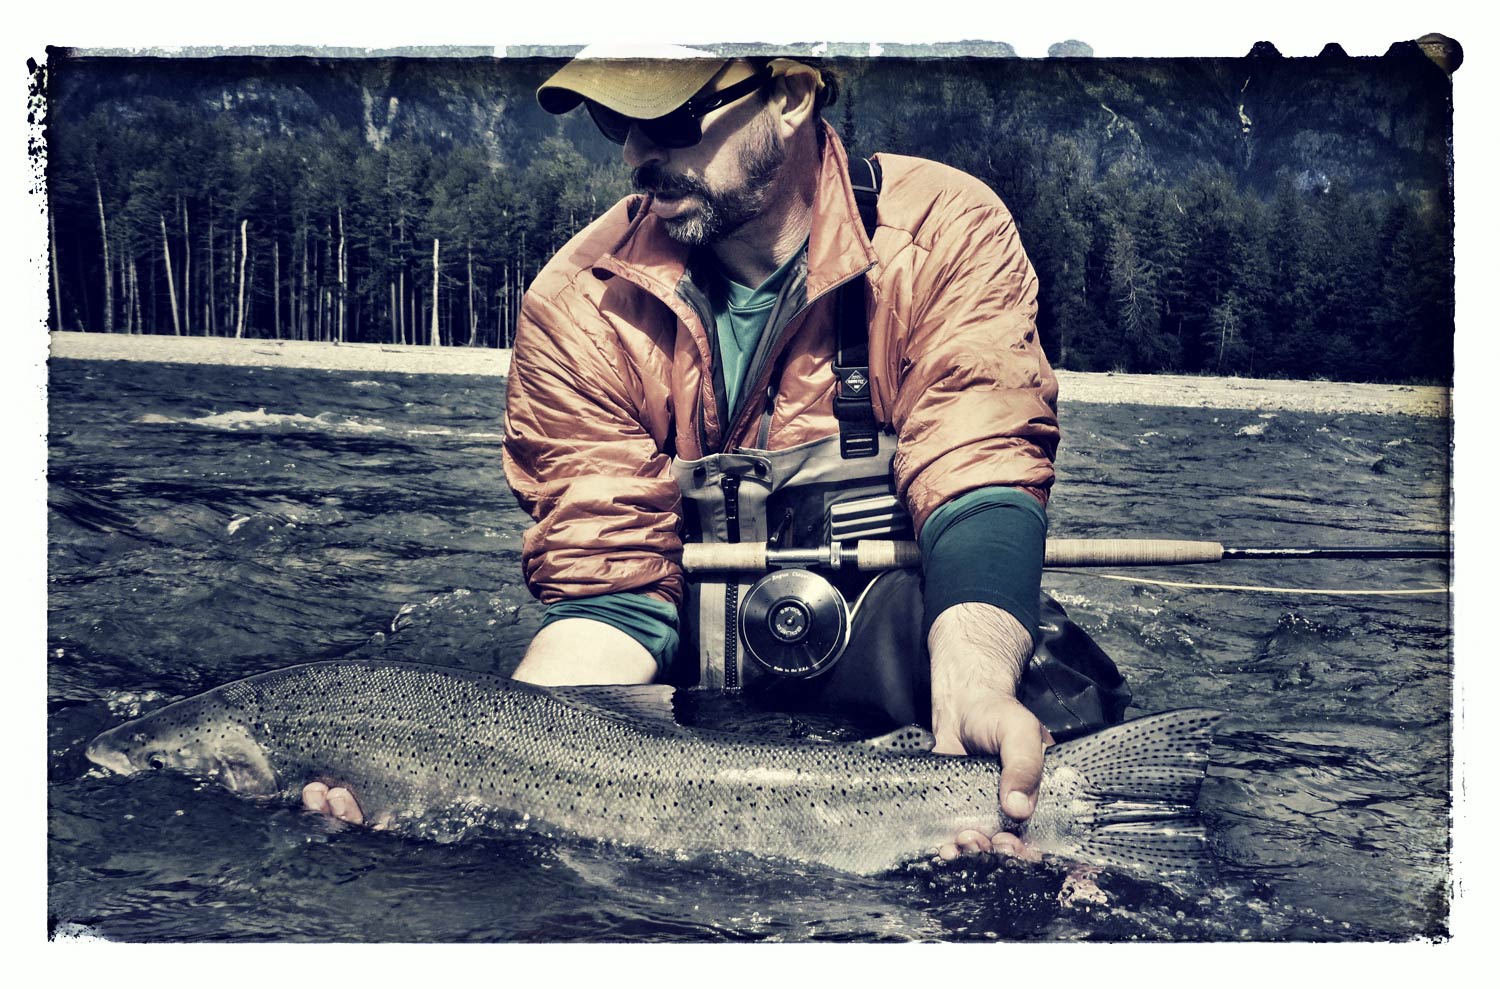
1. Get Down- This is a simple one and in my opinion, helps the fish out just as much as your photographic desires. Once you’ve landed the fish and are near a shallow area, get down on your knees to handle/photograph the fish. Just as important, however, is that your photographer does the same. Your goal here is to get the camera having a straight line shot at you and the fish. Another benefit to this method is that if the fish does slip out of your hands back into the water, it’s going to have a much shorter/safer fall. Additionally, always keep the fish over water in the event it does end up back in the drink quicker than expected. Fish are no different than us in the fact that it feels much better to fall into water than onto rocks.
2. Belly To The Bottom- This is another one I see time and time again- particularly with newer anglers. The good news is, it’s very easy to correct. Once the fish is in your hands and it’s time to hold it up for the camera, rotate the belly of the fish towards the river and it’s dorsal fin towards the sky. This will make the fish nice and upright in the photo (which will show it off better) as well as make the fish feel more supported. If you’re holding a fish at any angle ‘tilted back’ towards you, it will make the fish much more tense/unbalanced and therefore more likely to try and wiggle free.
3. Fingertips On The Belly, Thumbs On The Back- Of all the tips listed here, this might be the easiest one to instantly start getting better quality photos. I think we would all agree that the point of taking a fish photo is to show off the fish, right? Yet time and time again I’ll see a photo where over half of the fish is covered up by the anglers hands/fingers. When reaching for a fish in the net, first make sure the fish’s back is towards you. Next, with your palms facing the sky, slide both hands underneath the fish (one hand by the tail, one by the head) until your fingertips can wrap around it’s belly. Next, place your thumbs right on the top of it’s back. Now hold it up! (while remembering step #2). I think you’ll instantly find the fish feels very relaxed and supported for the photo. What you want to avoid here is sliding your hands too far under the fish so that your fingers wrap clear up it’s side- which happens to be the side facing the camera. I always call this pose the ‘sandwich hands’ b/c it looks like you’re holding a big sandwich! Just think about it for a sec….I think you’ll see what I mean.
**side note- sometimes big fish do require you to put your hands one opposite sides of the fish. I get that. In my opinion though, any fish under 18” is always going to look better in a pic if both hands are on the same side of the fish.
4. Where’s The Sun?- Here’s another easy one that doesn’t take much effort to do correctly. In simplest terms, always be looking into the sun when taking a picture with a fish. A photo taken where the sun is at your back will make the fish and your face (particularly under the brim of your hat) look very dark. Ensuring the sunlight is in your favor will light up the fish and show off all its natural colors, therefore instantly making your photo much better.
5. Relax The Elbows- I know we’ve all seen it…and let’s be honest, probably done it a time or two. Holding the fish with arms so outstretched that your elbows are locked will never make your photo look the best, or more importantly, the most natural. There’s nothing wrong with holding a fish out for the camera, let’s just make sure we’re all keeping a slight bend in our elbows next time.
6. Frame It Up- This last point is how we really tie this whole lesson together. Now that you’ve got the fish supported, it’s over the water, our light is good and our elbows are relaxed, hold the fish about chest high. During a fish photo, the fish is our subject matter—and more importantly—we want our subject in the center of the picture. Nothing can make a fish photo lose quality quicker than holding it too low (like near your waist line). Holding a fish in this manner brings you (the angler) into the photo more and moves our subject to the bottom of the picture. As you can likely guess, this is never ideal. On the flip side of holding a fish too low is holding it too high. This can quickly result in covering up half of your face…also not ideal.
A few other tips- 1. If you’re the one taking the picture, make sure you get the angler’s entire head in the shot. (If I had a dollar for every fish picture I’ve seen where the angler is half-decapitated I could likely take early retirement.) 2. Take a shot or two and then give the fish a drink. Check your camera to make sure you got the shot and then retry if necessary. (Remember fish don’t like not being able to breath) 3. Clean up the clutter. (remove unnecessary items from the background. I.e water bottles, nets, rods lying on the bank, etc. You don’t want anything distracting the subject) 4. Remove the hooks before photographing. (unless you’re trying to take an artsy photo with a giant hopper in the fish’s mouth, removing the flies pre-photo will always be best for the fish. Let’s face it, taking a picture with a fish puts extra stress on it. The last thing we want is for a fish to wiggle free during the shot and get tangled up in the line still attached to it).
If you’ve ever felt frustrated with the quality of your fish pictures, I encourage you to put these tips to use next time you’re on the water. Not only will the quality of your shots instantly improve, it will also allow you to get your photos taken much quicker and more efficiently. The fish will thank you.
Kyle Wilkinson Gink & Gasoline www.ginkandgasoline.com hookups@ginkandgasoline.com Sign Up For Our Weekly Newsletter!
I have found the best way to get great fishing pictures is to just fish with Louis – although I have still not gotten any pictures from our February Argentina trip!!!
What are some tips for taking night photos? I’ve landed some of my biggest Browns at night only to get home to a bunch of blurry dark pics. Usually looks more like a nice carp instead of a trout… One of the biggest problems is the fog, which with any amount of flash illuminates and makes a nice haze in the photo. Is there a setting/exposure/lens speed to get around this? Thanks for any help.
When I hit “print” to save a particular post as a hard copy, the output is a series of two to three words per line extending forever! Yours is is the only website that I have a problem with printing. Articles are very informative but sometimes I really want an old fashion hard copy. Thank you.
Dr. Roland Kehr
Dr. Kehr,
I see what you mean about the rather odd print pattern. For the future, should the site continue to print that way, you could try copy/pasting the post into Word (or a similar program). For the short run, that may provide an option for a hard copy that isn’t 12 pages long.
Have a wonderful Day!!
Thanks Mike but I solved the “problem”. While viewing the article in Microsoft Edge I switched to Reading View (the open book icon next to the star icon at the top of the screen) and all is well!!!! Article printed out just fine as per the settings that I enabled (duplex printing, print on both sides,etc,etc).
Dr. Roland Kehr
Great tips but how about a follow up with regard to how to photo yourself and the fish when fishing solo?
Here you go David. http://www.ginkandgasoline.com/fly-fishing-photography/getting-the-hero-shot-when-youre-fishing-solo/
Pingback: Three Good Articles | Fly Fishing Articles from Other Websites
I was wondering if you allow reprints of articles like these. I edit the Pennsylvania Steelhead Associations TightLines digital newsletter and I would like to put this article in our next months addition….if you would allow it. I think it would be useful to our members. I would give the proper credit of course.
Sam Zacour
PA Steelhead Association
On occasion. Shoot me an email. hookups@ginkandgasoline.com