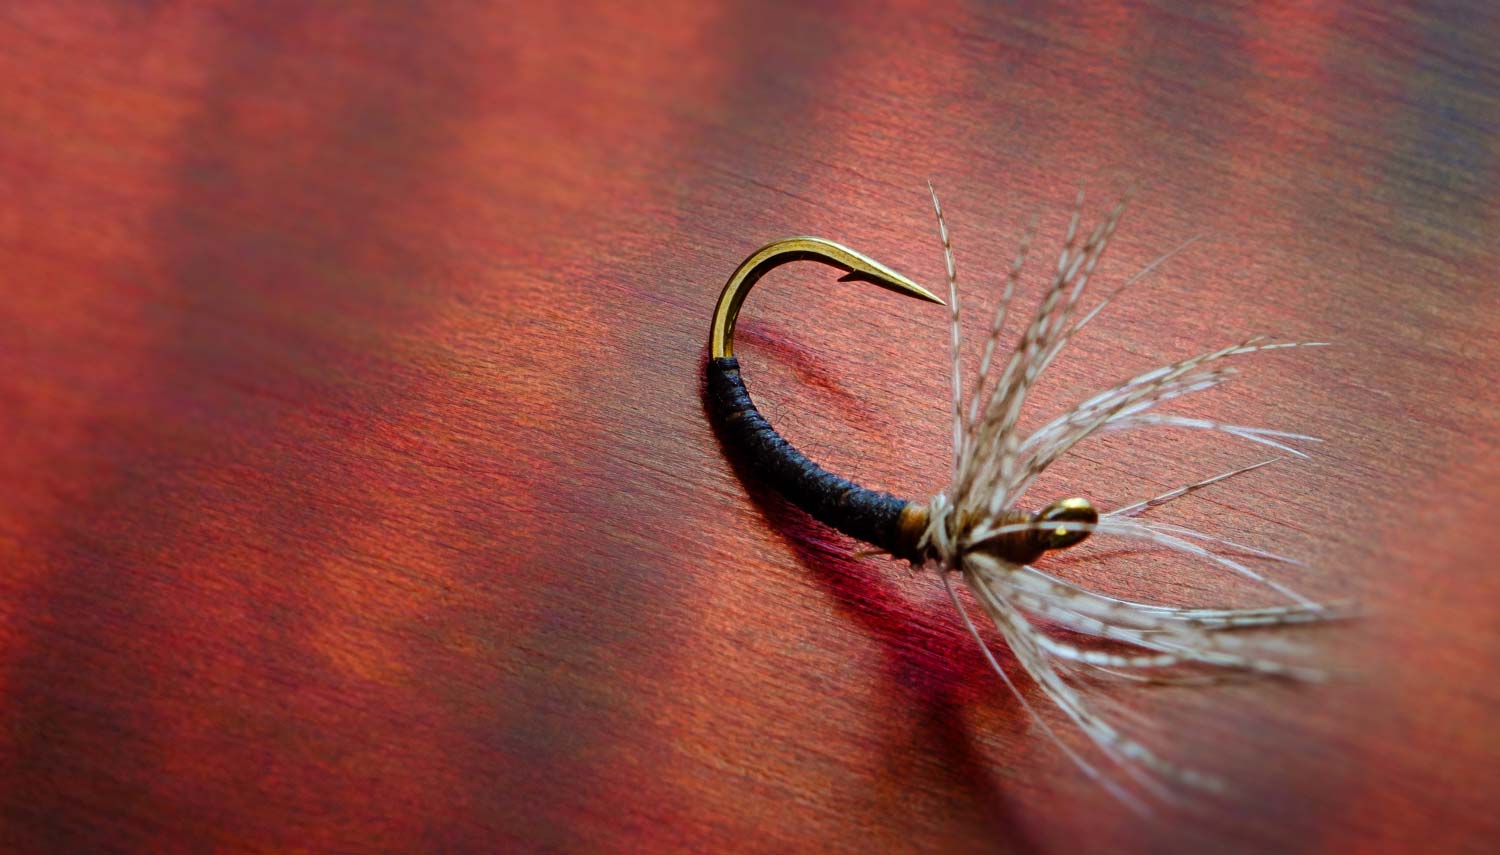
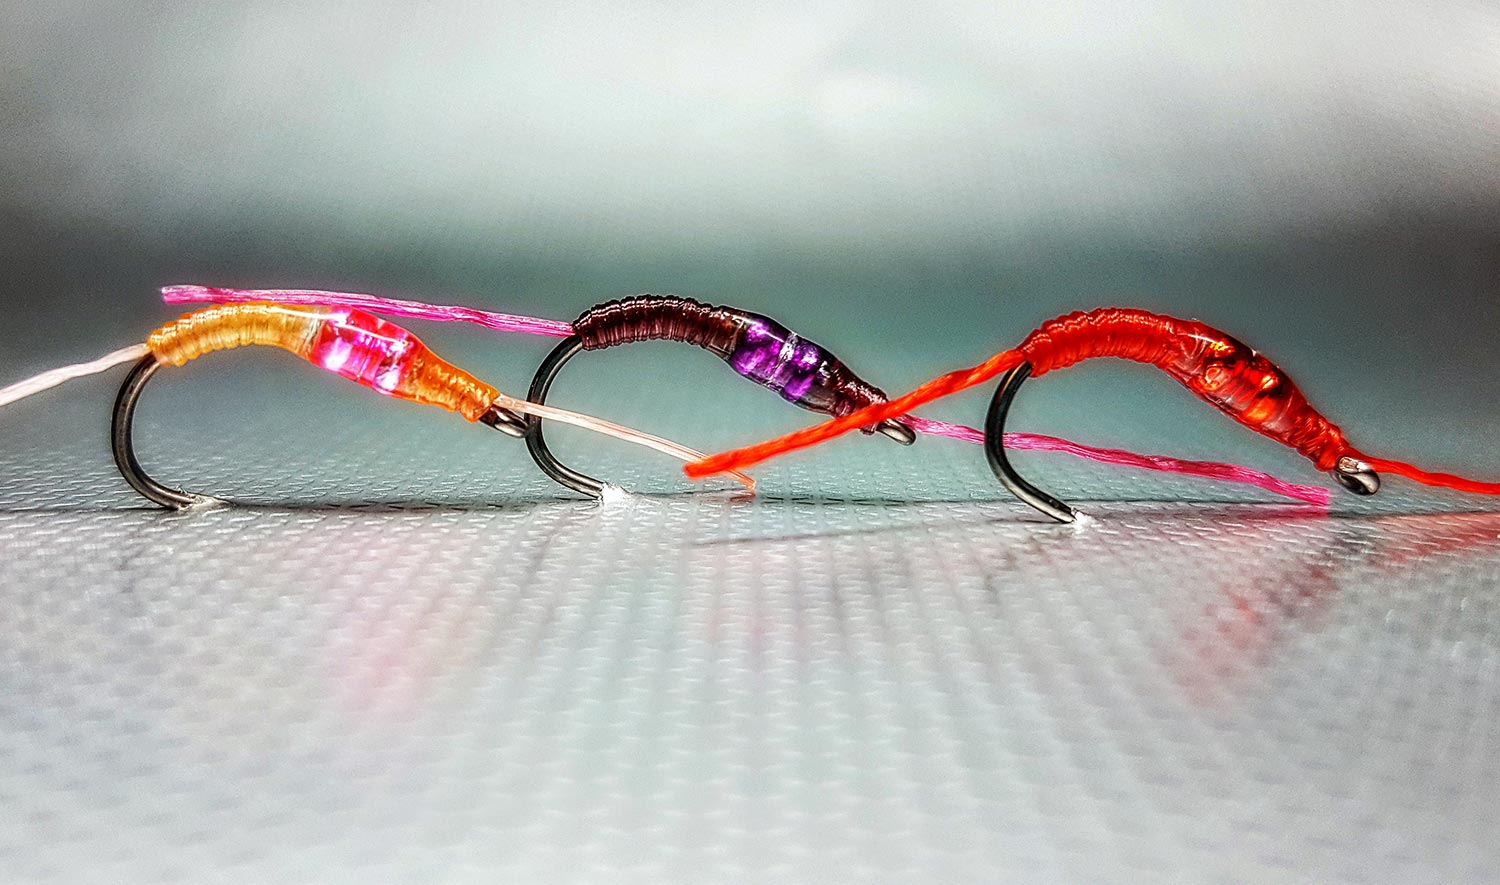
Tenkara and the Sasaki Kebari
By Mark Roberts
I’d like to share just a little my insight about the Sasaki Kebari as I have learned to use it in Tenkara.
I have been a Single Hand Spey, and Switch fly fisherman for many years and added Tenkara about five years ago for what it has to teach me to become a better fisherman. Simplicity. Learning to do more with what I have, to fish different conditions. The very first time I used my new Tenkara rod and Sasaki Kebari was on a lake. A buddy of mine and I fished the entire shoreline of that lake with our single hand rods and traditional flies and got nothing. I took out my brand new Tenkara and put on my first Sasaki Kebari I tied and caught my first trout in one minute. Caught five more in the next hour.
The Sasaki Kebari can be used as a surface dry fly, as a subsurface wet fly, or as a nymph. The mechanics are that as either a surface or subsurface fly, it is important to have a rod with a sensitive and quite flexible tip. My rod is a larger 13 1/2’ stiffer Tenkara USA Amago, and I use it a lot fishing on the Deschutes River here in Oregon for Redsides. Even with its size and stiff backbone, the Amago has a very sensitive tip.
Typically, just tapping your index finger on the rods handle will immediately transfers that vibration into the fly, as long as you have a line without slack in it. For a surface fly, it looks like a bug fighting for its life, and sending shock waves out into the water quite a distance, which does attract fish.
For a surface fly, the Sasaki Kebari has three benefits, as I see it. Viewed from beneath, it looks like a generic bug with its wings out fluttering fighting for its life. With most Western traditional dry flies, the fisheye view produces just a silhouette of what appears to be a dead bug.
While fishing the Sasaki Kebari subsurface, it helps to act like a mini sea anchor in the current to create a line without slack, making it easier to feel in your hand and see in the rod tip if a fish is mouthing, or taking, the fly. The same index finger tapping will make the Sasaki Kebari look alive and pulsating in clear water. In colored water it can be sending out shock waves to attract fish from a distance. In a drift in colored water, it can feel much more like live food to a mouthing fish.
There are numerous different Tenkara style flies that were used in Japan in different regions of the country. Sasaki Kebari style is
Read More »Leader Materials Revisited
By Louis Cahill
So which is actually stiffer, monofilament or fluorocarbon?
A while back I wrote an article on understanding leaders. While talking about the different materials used in fly leaders I mentioned that mono is stiffer than fluorocarbon and I got called out in the comments by a couple of readers. Rightfully so. One of my pet peeves is when people talk about fly fishing from a narrow perspective, forgetting that there are many different kinds of fly fishing, and damned if I didn’t do it myself.
So what’s the answer? Which is stiffer, mono or fluorocarbon?
The answer is, it depends.
When I wrote that mono is stiffer, I was thinking about casting and I was thinking as a saltwater angler. I totally ignored how most anglers use the material. One of the fundamental differences between the two materials is that mono
Read More »Small Stream Structure- Holes, Bends, Runs Etc.

By Jason Tucker
In the public mind there is probably no feature that comes more readily to mind than the Ole Fishin’ Hole.
A lot of non-fishers think that is what fishing is about- going to a big, well-known hole, soaking bait, waiting for the fish to bite. I certainly spent a lot of my childhood believing this was the way to fish.
Especially once you get into fly fishing, you realize those big holes don’t hold all the fish, and probably are some of the least interesting places for the fly angler. After all, fish on the bottom of that big hole aren’t likely to rise eight feet through the water to hit your fly. Learning to identify fish holding water and cover on a small stream is just as important as your casting and fly selection. It is especially important because you need to identify these spots from a distance, pick out the likely fish holding lies, so that you can stealthily approach the spot and present your fly. I can’t tell you the number of times I have (and still do) failed to properly identify fish holding structure and blundered into a spot that was a great opportunity just waiting for my fly.
Holes. After demeaning them at the outset, it is time to redeem them. Holes hold fish, lots of fish, but it’s not enough to approach one and start flogging.
The problem with holes is that a true hole will be too deep to fish a dry fly unless you see fish lingering near the surface feeding. This does happen, and if you run into that situation, by all means move into position and start casting. More often you will find yourself happening on a hole with no perceptible action and will need a game plan. There are four areas to concentrate on when you get to a hole: the tailout, the margins, the head, and the hole itself.
If you’re fishing from downstream, the tailout is what you want to concentrate on first. I spent many a summer day observing big holes in rivers as a child. There was a bridge on a hole that we always fished. The bridge was in the middle of nowhere, not even on a road. I believe that landowner had the bridge repaired at some point, as it was in good shape. It was originally a stagecoach bridge in Michigan’s logging days. It served an old hotel that used to be there. Nostalgia aside, I learned a lot sitting on that bridge soaking worms.
When we would walk out on the bridge it was common to watch thirty or more fish scoot for cover in the deepest part of the hole. The thing to do then was to sit still and wait for the fish to relax and return to their feeding lies. After ten minutes small fish would start to move back out into feeding positions. After twenty minutes they would start to feed again. After thirty minutes even the larger fish would become visible if they were going to feed. A lot of the prime lies were near the bank on the deep side, and also at the head of the hole, but a lot of fish would drift back to the tailout and wait to feed. So when you are approaching a hole this is where you want your first cast to go. You’ll want your fly to land where the color changes from dark to lighter. The fish here may be sensitive to being cast over, so you don’t want to cast too far into the center of the hole and line the fish. Make a few casts to the tailout and work the whole area from shallow to deep before moving onto your next target.
The next target is the margins of the hole. Typically at least one side of the hole has a gradual slope to the bank. Fish that want to feed will
Read More »Keep On Stripping!
By Justin Pickett
One of the things that I’ve learned over the years, and something that I stress to my clients, is to always, Always, ALWAYS finish your retrieve when stripping streamers.
I can’t begin to count the amount of times I’ve had a trout slam a streamer at the last second, right before the fly was pulled from the water. On the flip-side, I’ve also lost count of the times that I’ve had the water erupt at the fins of a trout trying to smash the streamer that I was pulling off the water. You just never know when you’ve caught some beasty’s curiosity… just not enough of it to entice an immediate eat.
Take musky for instance; these snaggletoothed dinosaurs are known for following flies all the way to the fly shop stickers, only to turn their discerning nose and head back to their underwater dwelling. To help those noncommittal musky, anglers developed the figure-eight technique in order to increase their odds of hooking up. They do it religiously, and out of habit, cast after cast. The reason they do this is simply because they never know when that musky they’ve been after the past 9,999 casts is following closely behind, just waiting for the fly to pause, wiggle, or jackknife just right. Now, I’m not saying that you need to start figure-eighting your trout streamers, but I’ll often strip my streamer until my leader is just shy of the tip of the rod and then pull the rod either in front of, or behind, the boat in a jerking motion. This gives you a little more water to work with, and might entice a strike from a trout that you may not have known was following your fly. Take advantage of all that water and work as much of it as possible!
If you’re fishing from a drift boat, make sure to keep that thing swimming well inside the oars.
Don’t stop, and keep your eyes peeled! I’ll never forget the day Louis and I went fishing with our buddy Jason Tucker. Jason, who writes the blog Fontinalis Rising, was twerking a black sex dungeon on
Read More »The Saltwater 6 Weight, Why I Love It!
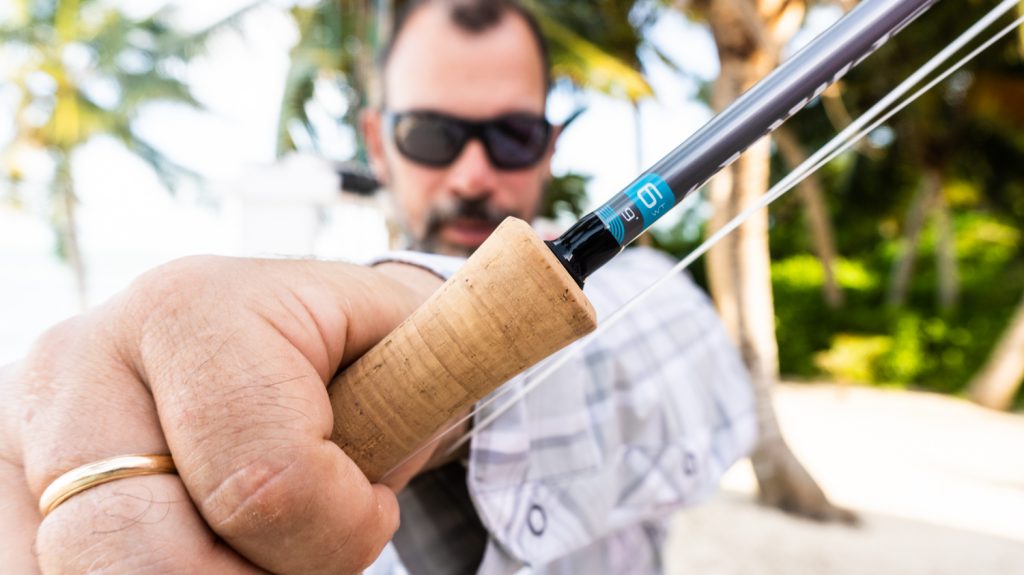
For years now, the saltwater 6 weight has been my secret weapon. The 6 weight sits right on the edge of what’s considered suitable for saltwater. Not every rod manufacturer makes one, and not every saltwater line is available in 6 weight but for those of us who love them, they are irreplaceable. When I fish my 6 weight for bonefish, I feel like I catch more fish and bigger fish. I also feel like the fish I cast too eat the fly more aggressively. It’s not often you come across a piece of gear capable of changing a fish’s attitude but that’s exactly what the 6 weight does. I’ve also found that the common perception that you can’t land big fish, or cast a 6 in the wind, is just not true. Granted, there is some technique involved in both but I fish my 6 wt on the flats in wind up to twenty MPH regularly and have landed plenty of bonefish in the ten pound range with it. I’ve landed redfish even larger and one juvenile tarpon. The extra effort you may put into landing a fish is well worth the results. Skeptical? Watch the video and I’ll explain why the saltwater 6 weight is my favorite fly rod.
Read More »Reece’s Glo Worm
By Bob Reece
Whether you like it or not, fish eat worms.
This wiggly addition to fly boxes is adored by some and scorned by others. If you happen to be a fly fisher that embraces the application of annelids, this pattern is worth its weight.
When tying the Glo Worm, I use either the Tiemco C500BL or the 2499BL. Both hooks sport the slightly upturned hook point and strength required to hook and hold large fish. The addition of two tungsten beads rockets this pattern to the bottom, where it belongs. This quick descent puts and keeps the fly in the strike zone for longer periods of time. The combination of MFC Sexi-Floss and UV coat creates a natural translucency.
Worms work and some work better than others. Even among great simplicity, diversity and improvement exist. If you’re looking to step up your annelid game, light up your box with some Glo Worms.
Read More »You Can Mouse Just About Anywhere
Eight years ago, I got fed up with reading articles about people all around the country and abroad fly fishing with mouse patterns and landing truly giant trout.
It seemed every medium I read or watched, there were people showcasing how productive mouse fishing could be. The only problem was, where I lived in North Georgia, as well as the majority of my neighboring states, I heard very little about anyone fishing mouse patterns. You’d find a few patterns here and there in the fly bins at the local fly shops, but in actuality, I think most of those were being fished on farm ponds for bass not for trout. I couldn’t take it any longer, so I decided to go on a mousing binge, strictly fishing mouse patterns on my days off. I really wanted to figure out if mouse patterns would work just as well on my home waters as they did on blue ribbon caliber trout streams.
My first big brown trout fishing a mouse pattern.
It didn’t take long to find success. My second trip out I landed a 26 1/2″ wild brown trout on my home tailwater. It was one of the biggest documented fly caught brown trout on the surface that anyone could remember for quite some time. I then moved on to some of my favorite small mountain streams where I’d never heard of anyone tying on and fishing a mouse pattern. Again, my mouse experiment yielded incredible success, and I quickly turned into a mouse fishing enthusiast. I didn’t know if I was having luck because no other anglers were fishing these big mouse patterns, or if it was simply that very few anglers in my area were willing to accept mice were regularly being preyed upon by our local trout. I didn’t know for sure, but in all honesty, I didn’t really care. Success was success, and I was going to milk it before everyone caught on.
Here’s What I learned about Fishing Mouse Patterns that first year.
Read More »10 Tips For Catching Big Bonefish

Catching a bonefish is always a challenge, but to catch a big bonefish, you have to do everything right. Bonefishing is a little like playing the guitar. It doesn’t take long to be good enough to have a lot of fun but it takes a lifetime to master. I’ve been doing it for a long time and I still regularly have revelations about it. I suppose that’s why I love it so much. Over the years, I’ve learned a lot about what it takes to catch a big bonefish. Most of it the hard way. I’m going to share some of that hard won knowledge with you in the hope it will shorten the learning curve. Watch the video for my top 10 tip for catching big bonefish
Read More »The Albright Knot
The Albright Knot is a great knot for attaching a metal bite tippet to your leader.
It can also be used to attach the leader to the fly line or any time you are attaching materials of very different size or stiffness. Here’s Capt. Joel Dickey, in the last of his three part series on better salt water knots, to teach you the Albright Knot.
WATCH THE VIDEO AND LEARN TO TIE THE ALBRIGHT KNOT!
Read More »8 Tips For Retrieving The Fly When Bonefishing
By Louis Cahill
You’ve spotted the bonefish and made the perfect cast, what now?
The retrieve is where the magic happens. It’s your sales pitch to the fish and if you want to seal the deal you have to make that fly act like food. It’s a simple proposition but there are a lot of things to keep in mind. Ultimately, your retrieve is determined by three things: the setup, the conditions and the reaction of the fish.
Every presentation to a bonefish is different. That’s what makes targeting these fish so much fun. To be really successful you need to have a good understanding of the fundamentals of the retrieve and be able to adapt when things change.
With that in mind, here are 8 tips for better bonefish retrieve.
Does the fly matter?
By this I mean, do we retrieve flies differently based on the critter they imitate? To be honest, I think bonefish are pretty forgiving on this one, but I do fish as if it matters. That means I try to swim the fly like the natural would swim. Shrimp patterns get a rhythmic pulsing retrieve, crab patterns scurry and dive, baitfish patters swim more fluidly.
Look scared
Your fly not only needs to imitate the natural, it need to appear to be in distress. Like all predators, bonefish will prey on the weakest. I like for my fly to appear to panic a bit when the fish sees it.
Speed is dictated by the presentation
The speed of your retrieve should vary depending on the setup of your presentation. Bonefish are not accustomed to having shrimp charge toward them. If the setup of your shot means that you have to retrieve the fly towards the fish, your retrieve must be slow, as if your shrimp is clueless. Bonefish like to chase, so quick retrieve can get their attention if the fly is off to their side, moving away. Sometimes you will have to
Read More »