Tenkara Steelhead

A Little Color Photo by Louis Cahill

A Little Color Photo by Louis Cahill

By Tim Harris

Can tenkara make one a better steelheader?

When I moved to the Pacific Northwest over 20 years ago I was thrilled to finally be living in the land of steelhead. The fish was almost mythic growing up in the Midwest and I’d spent a bit of time chasing them in the Pere Marquette to no avail. But now I was in the land where steelheading developed and even the flies got their names – patterns like the Skykomish Sunrise, the Sol Duc, the Umpqua Special, and the Macks Canyon.

It took me a long time to catch that first steelhead on the fly and then I “cheated” by getting it on a nymph on the Deschutes one fall. In fact, I got four steelhead in that one afternoon from the same run nymphing, which was crazy after almost decade with no fish. I guess I finally got payoff for the thousands of casts I’d made. After I got those first fish via nymphing out of my system I went to only swinging flies on spey and switch rods and I’ve never gone back. I used to get out a lot when our local river still had a summer run, and would get 2-3 summer fish per season there along with one on the Deschutes in the fall and maybe one on the Methow or Wenatchee when these opened up. Winter fish, however, eluded me for a long time.  I finally got my first in 2013 on the Skagit, a beautiful wild hen of about 12 lbs.  After that nothing, despite hitting our local rivers at least a handful of days each winter.  Needless to say, my steelhead count was low, usually a handful of fish in a season with quite a few days spent on the water.

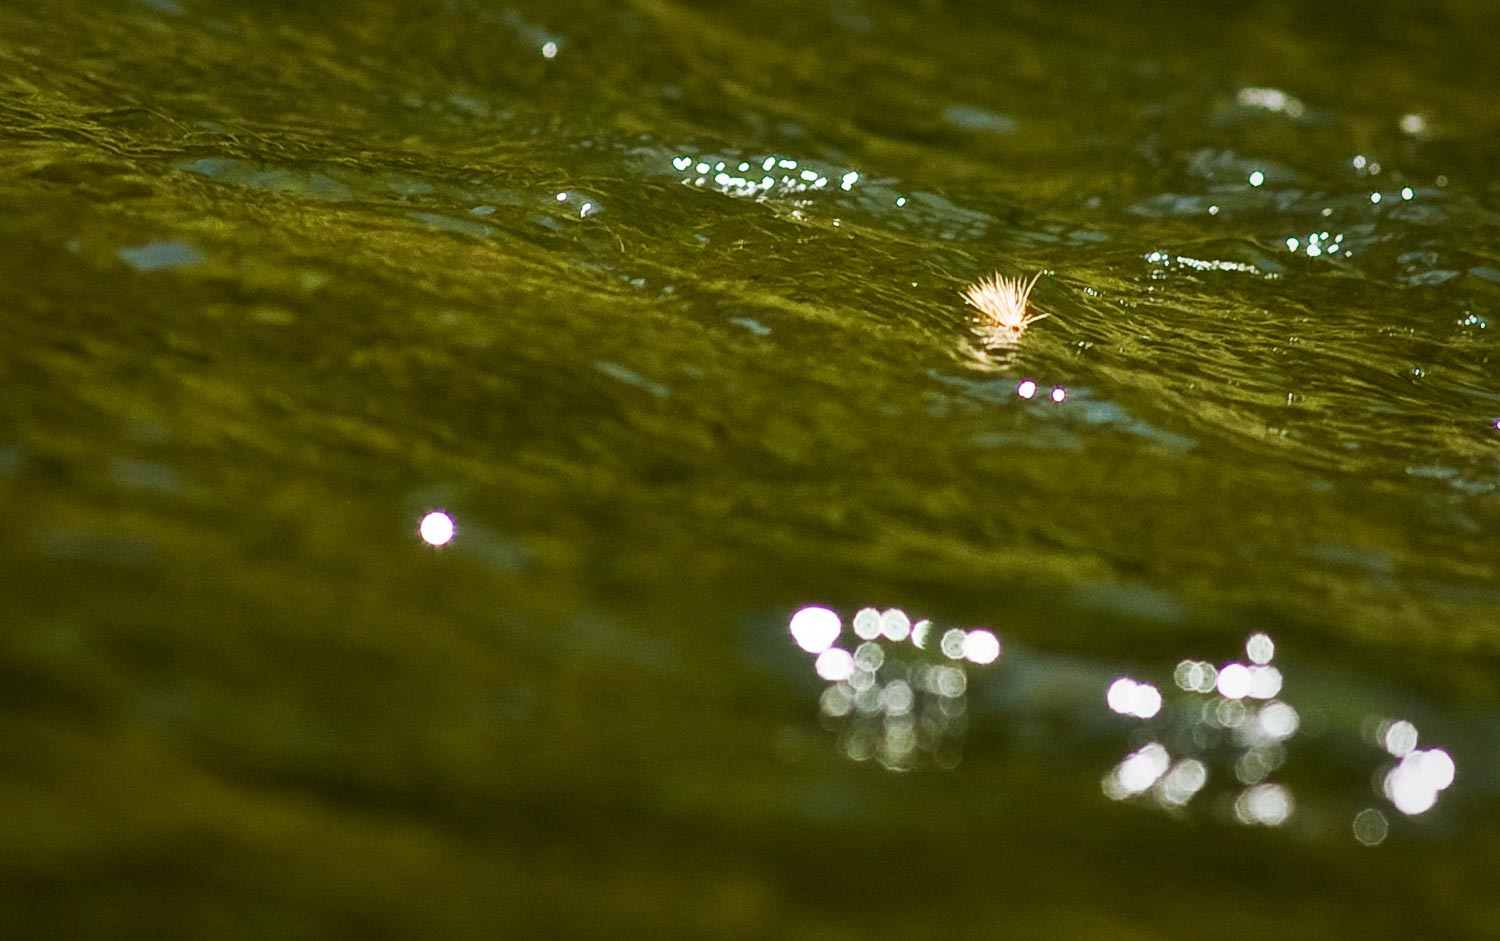
Then I took up tenkara and found that I could swing flies on the long tenkara rod for trout just like I swing flies for steelhead with a spey rod.   With tenkara one has ultimate control over the swing with the sensitive rod and a relatively short amount of line. I often swing with a 20’ line which is a long line for tenkara but it allows me to easily mend, hold much of the line off the water if needed, or lead the fly in soft water to completely control the swing of the fly. I probably catch the majority of my trout on tenkara swinging flies and it has become my favorite technique.  Plus it is perfect practice for steelhead and an 18” rainbow on my Rhodo seems about equivalent to a 26” steelhead on my 6-weight switch rod.

Has all this swinging on tenkara paid off?

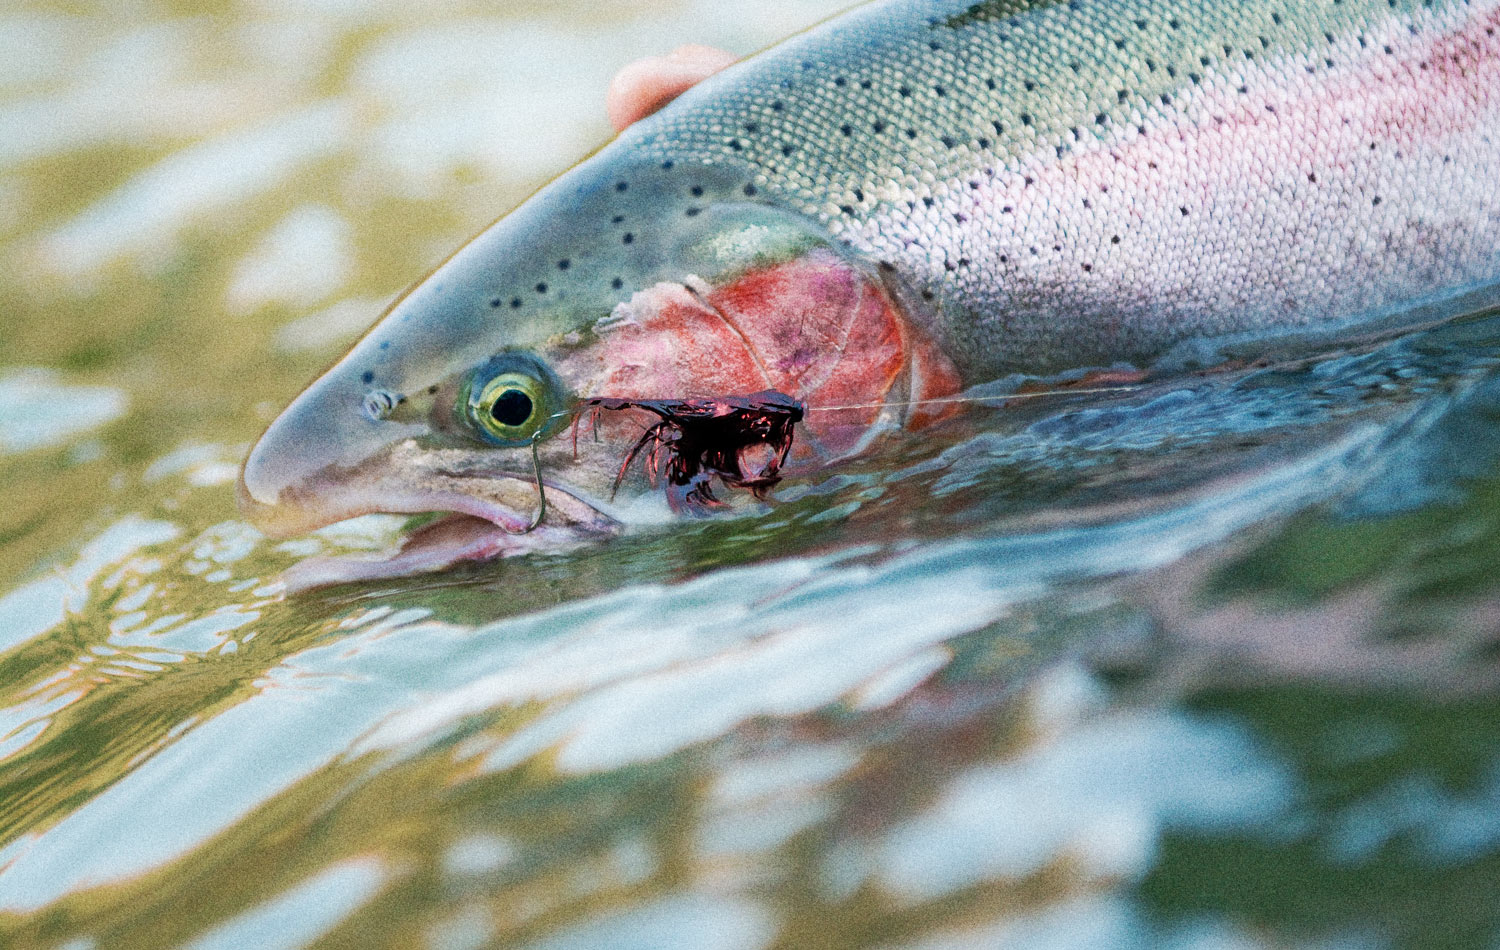
I think so.  Last winter I went out on my home river, the Snoqualmie, only three times in between bouts of high water.  There I use a 14′ 9-weight spey rod but for the first time I really felt like I had my swing under control.  In those three outings I landed one 14 lb. hen, had another soft grab that I messed up, and had another freight train hit that I have no idea how I didn’t get the hook set properly. I let my loop out, felt the head shake, then nothing. This was by far the best winter steelhead season I’ve ever had and all in about four to five hours on the river. I just returned from a Gink & Gasoline trip to the Deschutes where I got to swing for summer fish for the first time in several years. The results: in three days of fishing I managed to hook 5 steelhead, landed 3 and missed several other fish which grabbed the fly.  This was more fish in three days than I used to get in a few months of summer steelhead fishing.

So, was it tenkara?

I really think it has something to do with it. Swinging flies with tenkara has taught me all the nuances of controlling a swing and has let me feel a lot of grabs and land a lot of fish swinging flies on a long rod, all great practice for steel heading.

Tim Harris
Gink & Gasoline
www.ginkandgasoline.com
hookups@ginkandgasoline.com
Read More from Tim
 
Sign Up For Our Weekly Newsletter!
 

Hyperfocal Focus

Photo by Louis Cahill

Sometimes to get it all in focus, it has to all be out of focus.

Shooting photos you often find yourself wanting an object in the foreground and an object in the background both in focus. This can be a frustrating situation. Inevitably, focusing on either the foreground or the background leaves the other out of focus. There is a way to make it happen but it requires putting on your thinking cap.

It’s called hyperfocal focus and yes there’s going to be math, sort of. You may have noticed that on the barrel of your DSLR lens there is a scale that shows how far from the camera your point of focus falls. That tool is handier than you might think. Here’s how you use it to get the shot.

First focus on the foreground object that you want sharp. At this point it doesn’t matter whether you use auto of manual focus. Take a look at the scale. Let’s say your foreground focus is at three feet. Now focus on the background object that you want sharp. Let’s say it’s at nine feet. We now know we need to carry six feet of focus.

That six feet of sharpness is called depth of field or DOF. Literally the depth of our field of focus. We control the DOF with our aperture. Smaller apertures like F16 or F22 carry a wider DOF. Larger apertures like F2.8 or F4 have narrow DOF. If you’re confused don’t panic. Stay with me. The higher the F# the smaller the aperture. It’s a mathematic formula and I could explain it but it’s not important for this exercise and it’s frankly too much information.

So what we need is an F# that will carry six feet of DOF. Now it’s time to set your camera to manual focus! if you spent a whole lot of money on your lens it may have a scale that shows you the DOF for each F#. If so, that’s great. Choose an F# and set your focus so that three feet and nine feet fall between the brackets. If you don’t have the scale, don’t panic, just set your lens for the highest F#. If you want to get really technical, consult this nifty DOF calculator.

OK, I promised math so here it is. The thing about DOF is it’s a geometric progression. That means that as you increase your DOF by stopping down your aperture, you get twice as much DOF behind your point of focus as you do in front. Does your head hurt yet? Trust me it’s easy. Just divide the the distance you need to carry, in this case six feet by three then add that to the distance to your foreground object.

6′ / 3 = 2′ + 3′ = 5′

The six feet we need to carry divided by 3 plus the three feet to the foreground object equals five feet. Set your focus to five feet and shoot away! Nothing will look sharp in the camera but don’t worry. Have a look at the results and if you don’t quite get it all sharp, take a step back (away from the subject) and do the math again.

All of this takes a minute and it’s hard to pull off with a thrashing fish but under the right circumstance, it can take your photos to the next level. After a while, you will get the hang of it. I often use this technique, short hand, using my auto focus and selecting a point of focus that I feel is one third of the way into my scene. It pays of.

Pardon my shameless plug here. We are going to cover lots of this kind of thing in a hands-on photo class on our Andros South trip in January. We’d love to have you join us!

Come fish with us in the Bahamas!

 
Louis Cahill
Gink & Gasoline
www.ginkandgasoline.com
hookups@ginkandgasoline.com
 
Sign Up For Our Weekly Newsletter!
 

Let it ride

Photo by Louis Cahill

Photo by Louis Cahill

By Daniel Galhardo

Don’t recast your fly until it’s had a chance.

It takes some time to learn how to read water well. But, at least when it comes to fishing mountain streams, the concept is easy to grasp: fish are looking for food and shelter, and don’t want to spend a lot of energy looking for food. Currents bring them food, slow water and breaks in the current gives them shelter. With that in mind we quickly learn that seams where current meets calm water may be the best places to target with our flies.

Once we learn this basic piece of information, we all want our fly to land with 100% accuracy where we suppose fish will be. But, hey, sometimes it won’t!

In recent days I have been taking a lot of people fishing. Most were new to fly-fishing and to tenkara. After giving them some basic instructions on how to open the rod, how to tie the line to the rod tip and tippet to the tenkara line and then tie the fly onto it, I would teach them how to cast.

It’s been said that anyone can learn how to cast with tenkara in a matter of minutes. I have found that on average it takes 7 or 8 casts to learn how to cast with tenkara fairly well, and I’m not exaggerating. But, like anything, it takes time to get the tiny fly to land exactly where they want. If I had to guess, I’d say that in the beginning about 70% of their casts will land in the vicinity of where they wanted. Perhaps 25% will land just off the target zone. And, of course, about 5% will land on the trees in front or behind them, but that’s a different article for a different day.

The 25% slightly off-target casts is what I’m interested in making a point about. Actually, it doesn’t matter if it’s 25%, 50%, or even if you’re a bit off on just 5% of your casts. The point I want to make is that if you miss your intended target by just a little bit, don’t recast immediately, let it ride!

What I noticed in the last few days of taking people fishing is that very often when their flies didn’t land exactly where they had intended, they would immediately recast. The instant the fly touched the water, perhaps just downstream from the intended area, they would attempt to make a perfect cast. I noticed that over and over again. But, most importantly, I noticed in many of these attempts, the place where their fly actually landed could have held fish.

Perhaps the fly didn’t land in the very obvious foamy whirlpool pocket behind a boulder, but rather it landed just downstream from it, on a nice slick of water they had not noticed; or, the line didn’t stretch out perfectly and landed just a bit short of their target, but on a micro-seam they didn’t realize was there.

So, I started telling “my students” if the fly doesn’t land exactly where you wanted, don’t cast it immediately, let it drift for a few seconds before casting. There is a chance it will get in front of a fish. Reducing the number of immediate recasts has the added benefit of lessening the chance of spooking fish with a lot of motion. Of course, not every spot will hold fish, and some of the missed casts will land in places that almost certainly don’t have a fish. But, I think overall it may be a good habit.

Immediately correcting a “mistake” is a hard instinct to overcome. And, yes, we all want our flies to land on that obvious “foam-is-home” pool, or on the calm piece of water we suppose a big one is hiding. But, when your fly doesn’t land there, try letting it ride and see what happens. After all the fly that is in the water is the fly that catches the fish, and fish are not only in the places we suppose they will be.

Daniel Galhardo
Gink & Gasoline
www.ginkandgasoline.com
hookups@ginkandgasoline.com
 
Sign Up For Our Weekly Newsletter!
 Sato-Banner

Tenkara Fly-tying

Photo by Louis Cahill

Photo by Louis Cahill

By Daniel Galhardo

I initially got interested in fly-fishing because of flies and fly-tying.

The idea of creating a lure using feathers and thread was very appealing to me. Before I ever got my first fly rod I probably tied well over 100 flies. Of course, I got indoctrinated in the western fly-tying school, that of trying to imitate, at least somewhat closely, the insects that lived in the waters I fished. Then, I discovered tenkara. When I first discovered the method I saw in it just the idea of using a rod, line and fly. For my first year of tenkara fishing I continued using the western flies I had learned to tie: parachute adams, elk-hair caddis and some cool mayfly nymph imitations. And then I started learning tenkara from the people that had been doing it for decades in Japan, and I started paying closer attention to their flies.

Tenkara flies opened up a brand new world for me.

Sure, tenkara flies, called kebari in Japanese, were still supposed to fool fish by somehow looking like the insects those fish ate. While not all tenkara flies look the same, the most characteristic tenkara flies are the so-called sakasa kebari, or “reverse-hackle fly”. To a western fly angler they will look more like soft-hackles but with the hackle facing away from the bend of the hook, reversed. This reverse hackle style is very popular and has become my preferred style fly to use. With it, when I’m fishing in moving water the fly will always retain some profile to it rather than becoming a sliver and “disappearing”. I can also impart motion onto the fly, with a light pulsating of my rod, the fly will open and close and look very buggy.

Just like I got into fly-fishing because of flies and fly-tying, I can say that the tenkara flies and what they represent certainly had some impact on my interest in tenkara too. Tenkara flies show us the different approach of suggesting bugs rather than trying to imitate them. They also bring with them the philosophy of using any “one fly” (not changing flies nearly as much as we do in western fly-fishing), and the idea of tying the simplest fly you can get away with. How I wish I had known about tenkara flies when I started learning how to tie flies (my first several hundred flies I tied by hand, without the use of a vise.

Tenkara flies show us how simple fly-tying can be.

Here are two videos I think people should watch to learn about tenkara fly-tying

Mr. Amano, one of the most famous tenkara anglers in Japan, has always tied his flies without the use of a vise, just holding the hook and materials in his hands. Here’s how he does that:

When renowned tenkara angler, Dr. Hisao Ishigaki, came to give a demonstration at the Catskills Fly-fishing Center and Museum in 2009, he showed the fly that he uses and how he tied it. The only materials were black sewing thread, and cheap hackle. After he tied the fly, in about 50 seconds, someone asked him what other flies he would be showing. To which he responded, “This is it. This is the only fly I have used in about 10 years.” Here’s how to tie the fly that Dr. Ishigaki has successfully used to lure trout in Japan, as well as many streams in the US on his almost-yearly visits:

How to tie the Ishigaki kebari

On December 2nd we’ll start releasing a series of tenkara fly-tying videos that are currently in production. We’ll have a video coming up every week to show you how different people tie their own tenkara flies. www.tenkarausa.com

Daniel Galhardo
Gink & Gasoline
www.ginkandgasoline.com
hookups@ginkandgasoline.com
 
Sign Up For Our Weekly Newsletter!
 Sato-Banner

Tim Rajeff on Understanding Fly Rod Action

Screen-Shot-2015-08-18-at-3.45.29-PM

Fly rod action can be confusing, especially for the beginner.

Terms like fast and slow, tip flex and mid flex, which we use to describe the action of a rod can be vague to the uninitiated. When it comes time to choose a rod that’s right for your casting style and fishing application, too many anglers are just buying the rod with the best marketing.

Next week we are going to talk in depth about choosing the right rod and exactly how to go about doing it. Today, our buddy Tim Rajeff, owner and rod designer of Echo Fly Rods, is going to explain what some of the terms mean and how they apply to your fly fishing. He’s going to show you how rod designers fine tune their actions and discuss how weight and materials come into play.

Watch the 2 videos below and learn about rod action from one of the world’s best casters and rod designers.

Louis Cahill
Gink & Gasoline
www.ginkandgasoline.com
hookups@ginkandgasoline.com
 
Sign Up For Our Weekly Newsletter!